How to Onboard a Supplier
Last updated: August 6, 2026
Onboarding a new supplier in Spendflo involves a streamlined, automated workflow that coordinates approvals, risk assessments, integrations, and contract signatures across multiple teams. You can track the status of these tasks from the Request Details page or view all ongoing requests in the Requests section. To learn more about how these automated sequences function, see About workflows and About statuses.
Step-by-Step Onboarding Process
Follow these steps to complete the supplier onboarding workflow:
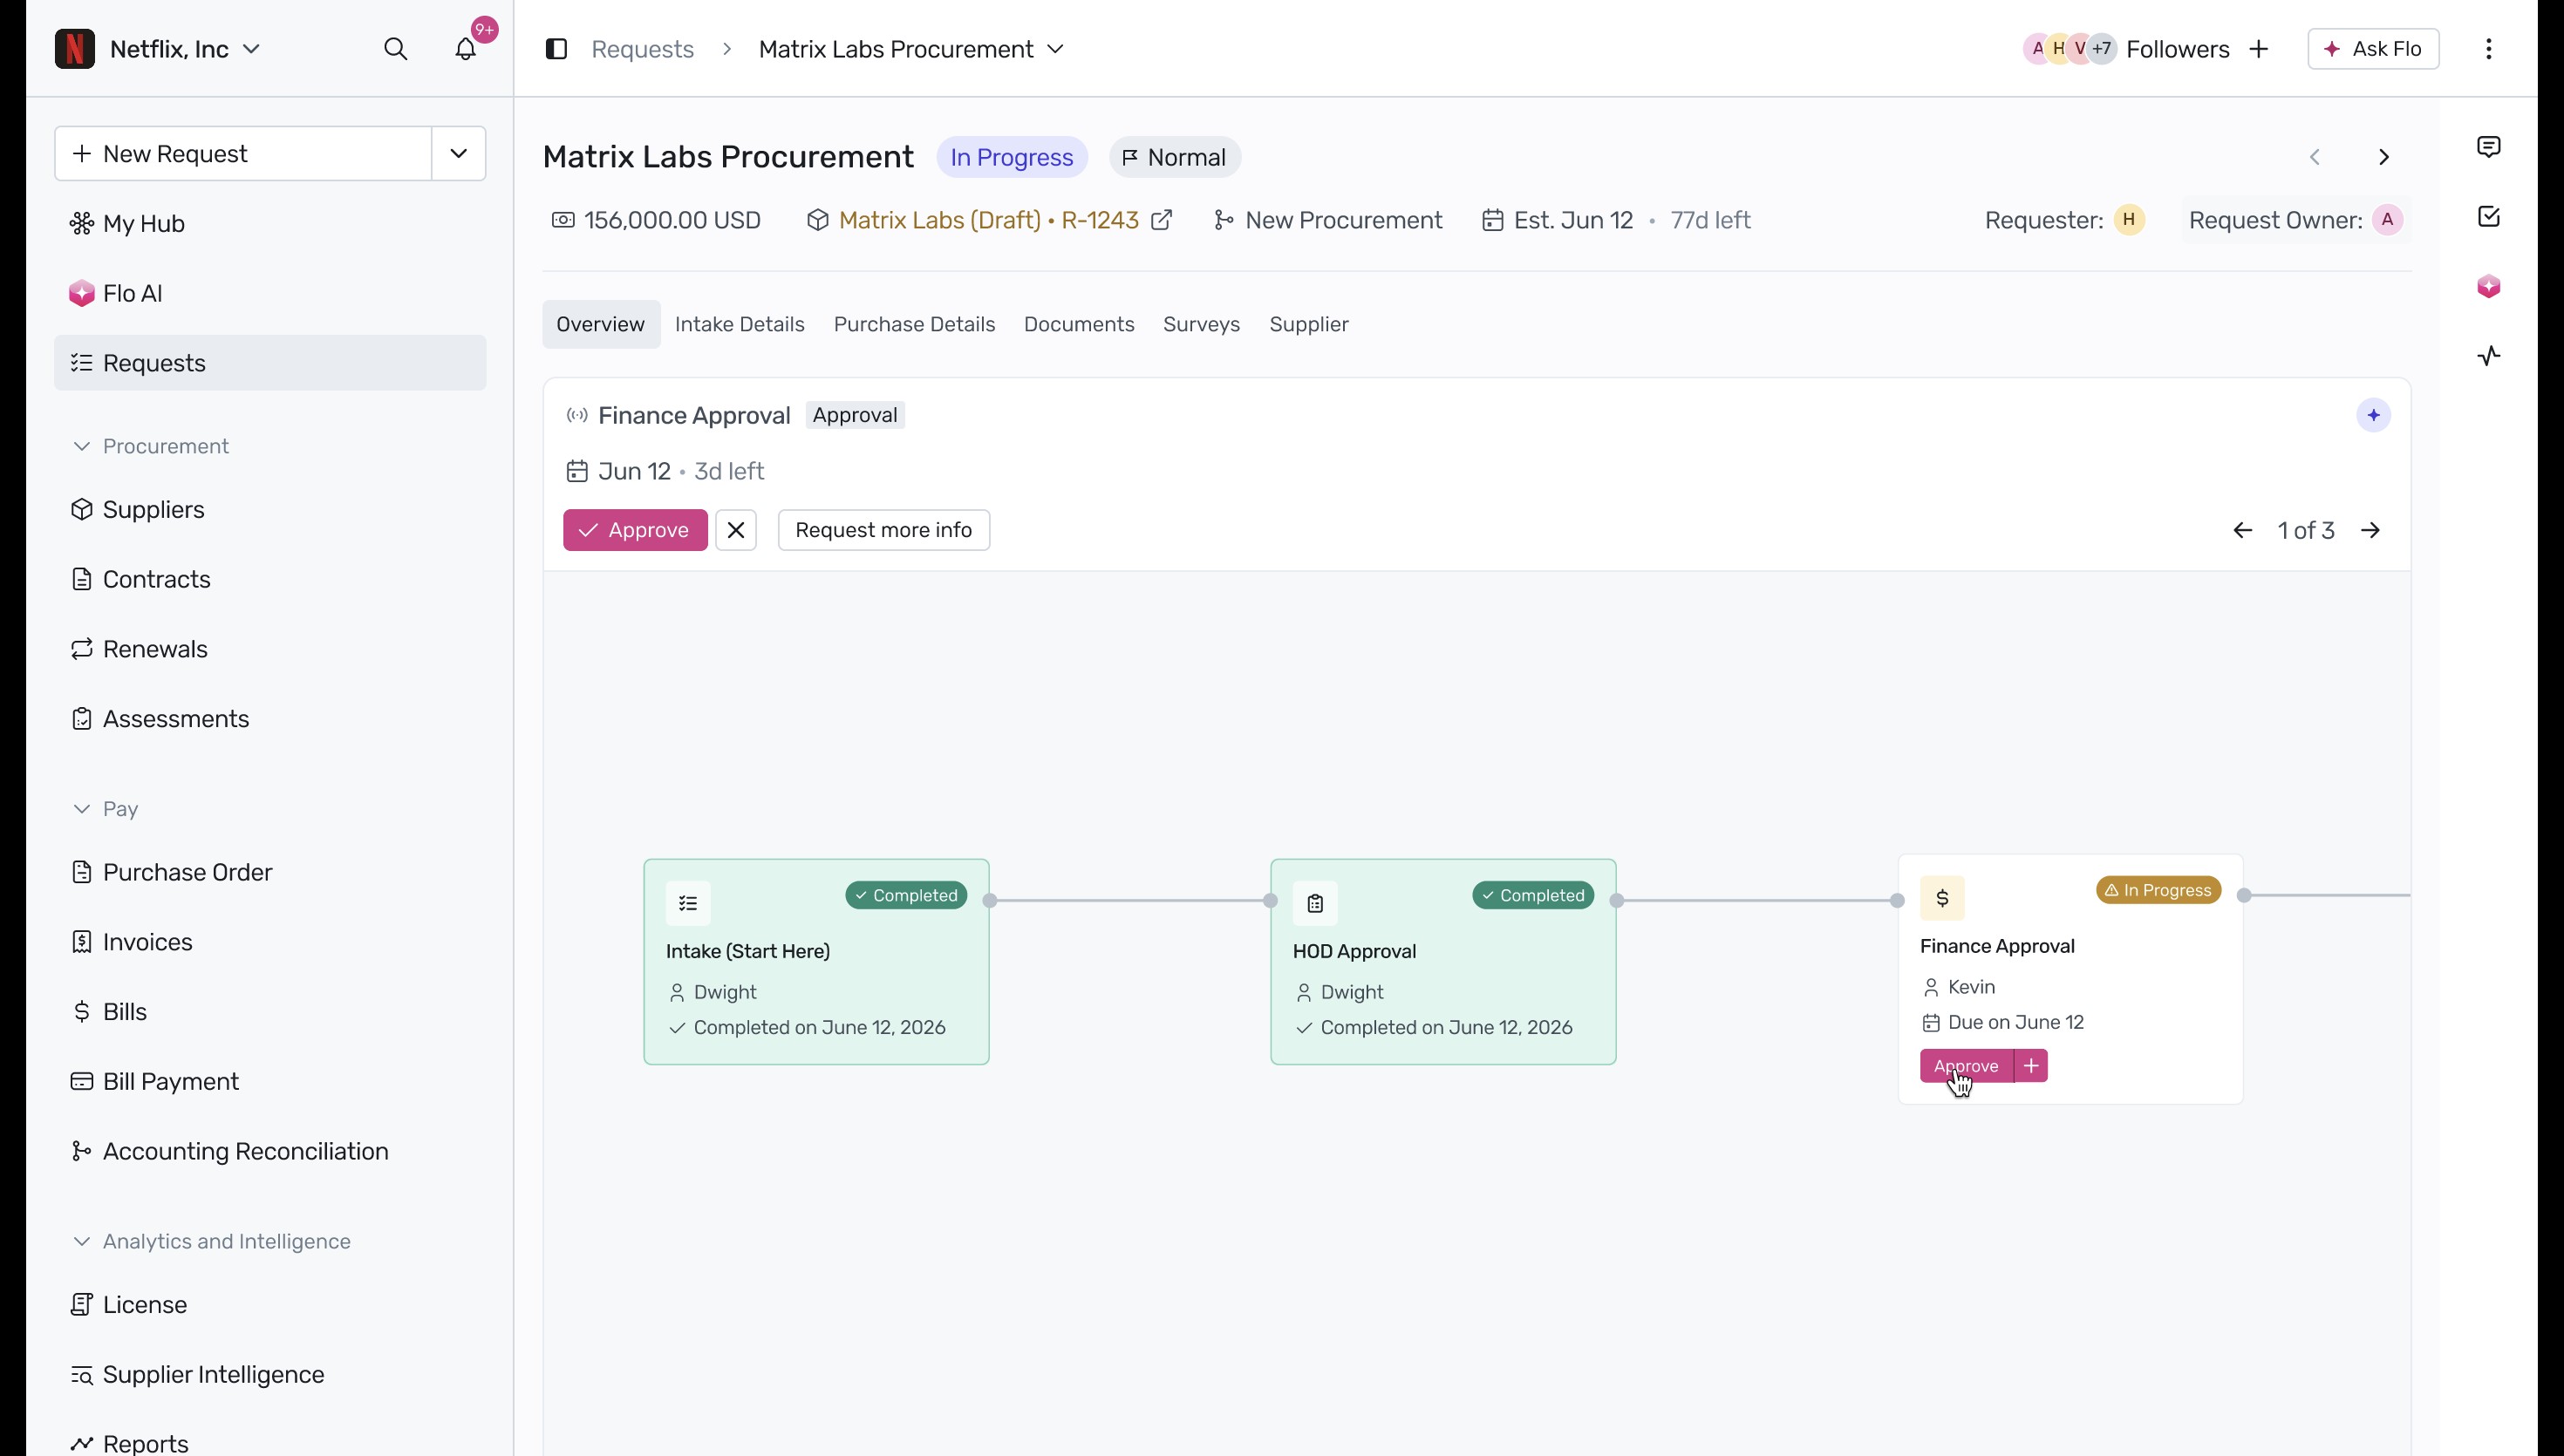
Navigate to the Requests section in Spendflo and open the active procurement request. In the workflow overview, click the Approve button on the Finance Approval card to review and approve the financial details.
In the Finance Approval modal, verify the supplier name, budget compliance, primary use case, currency, and amount. Check the box agreeing that all information complies with company guidelines, and then submit the approval.

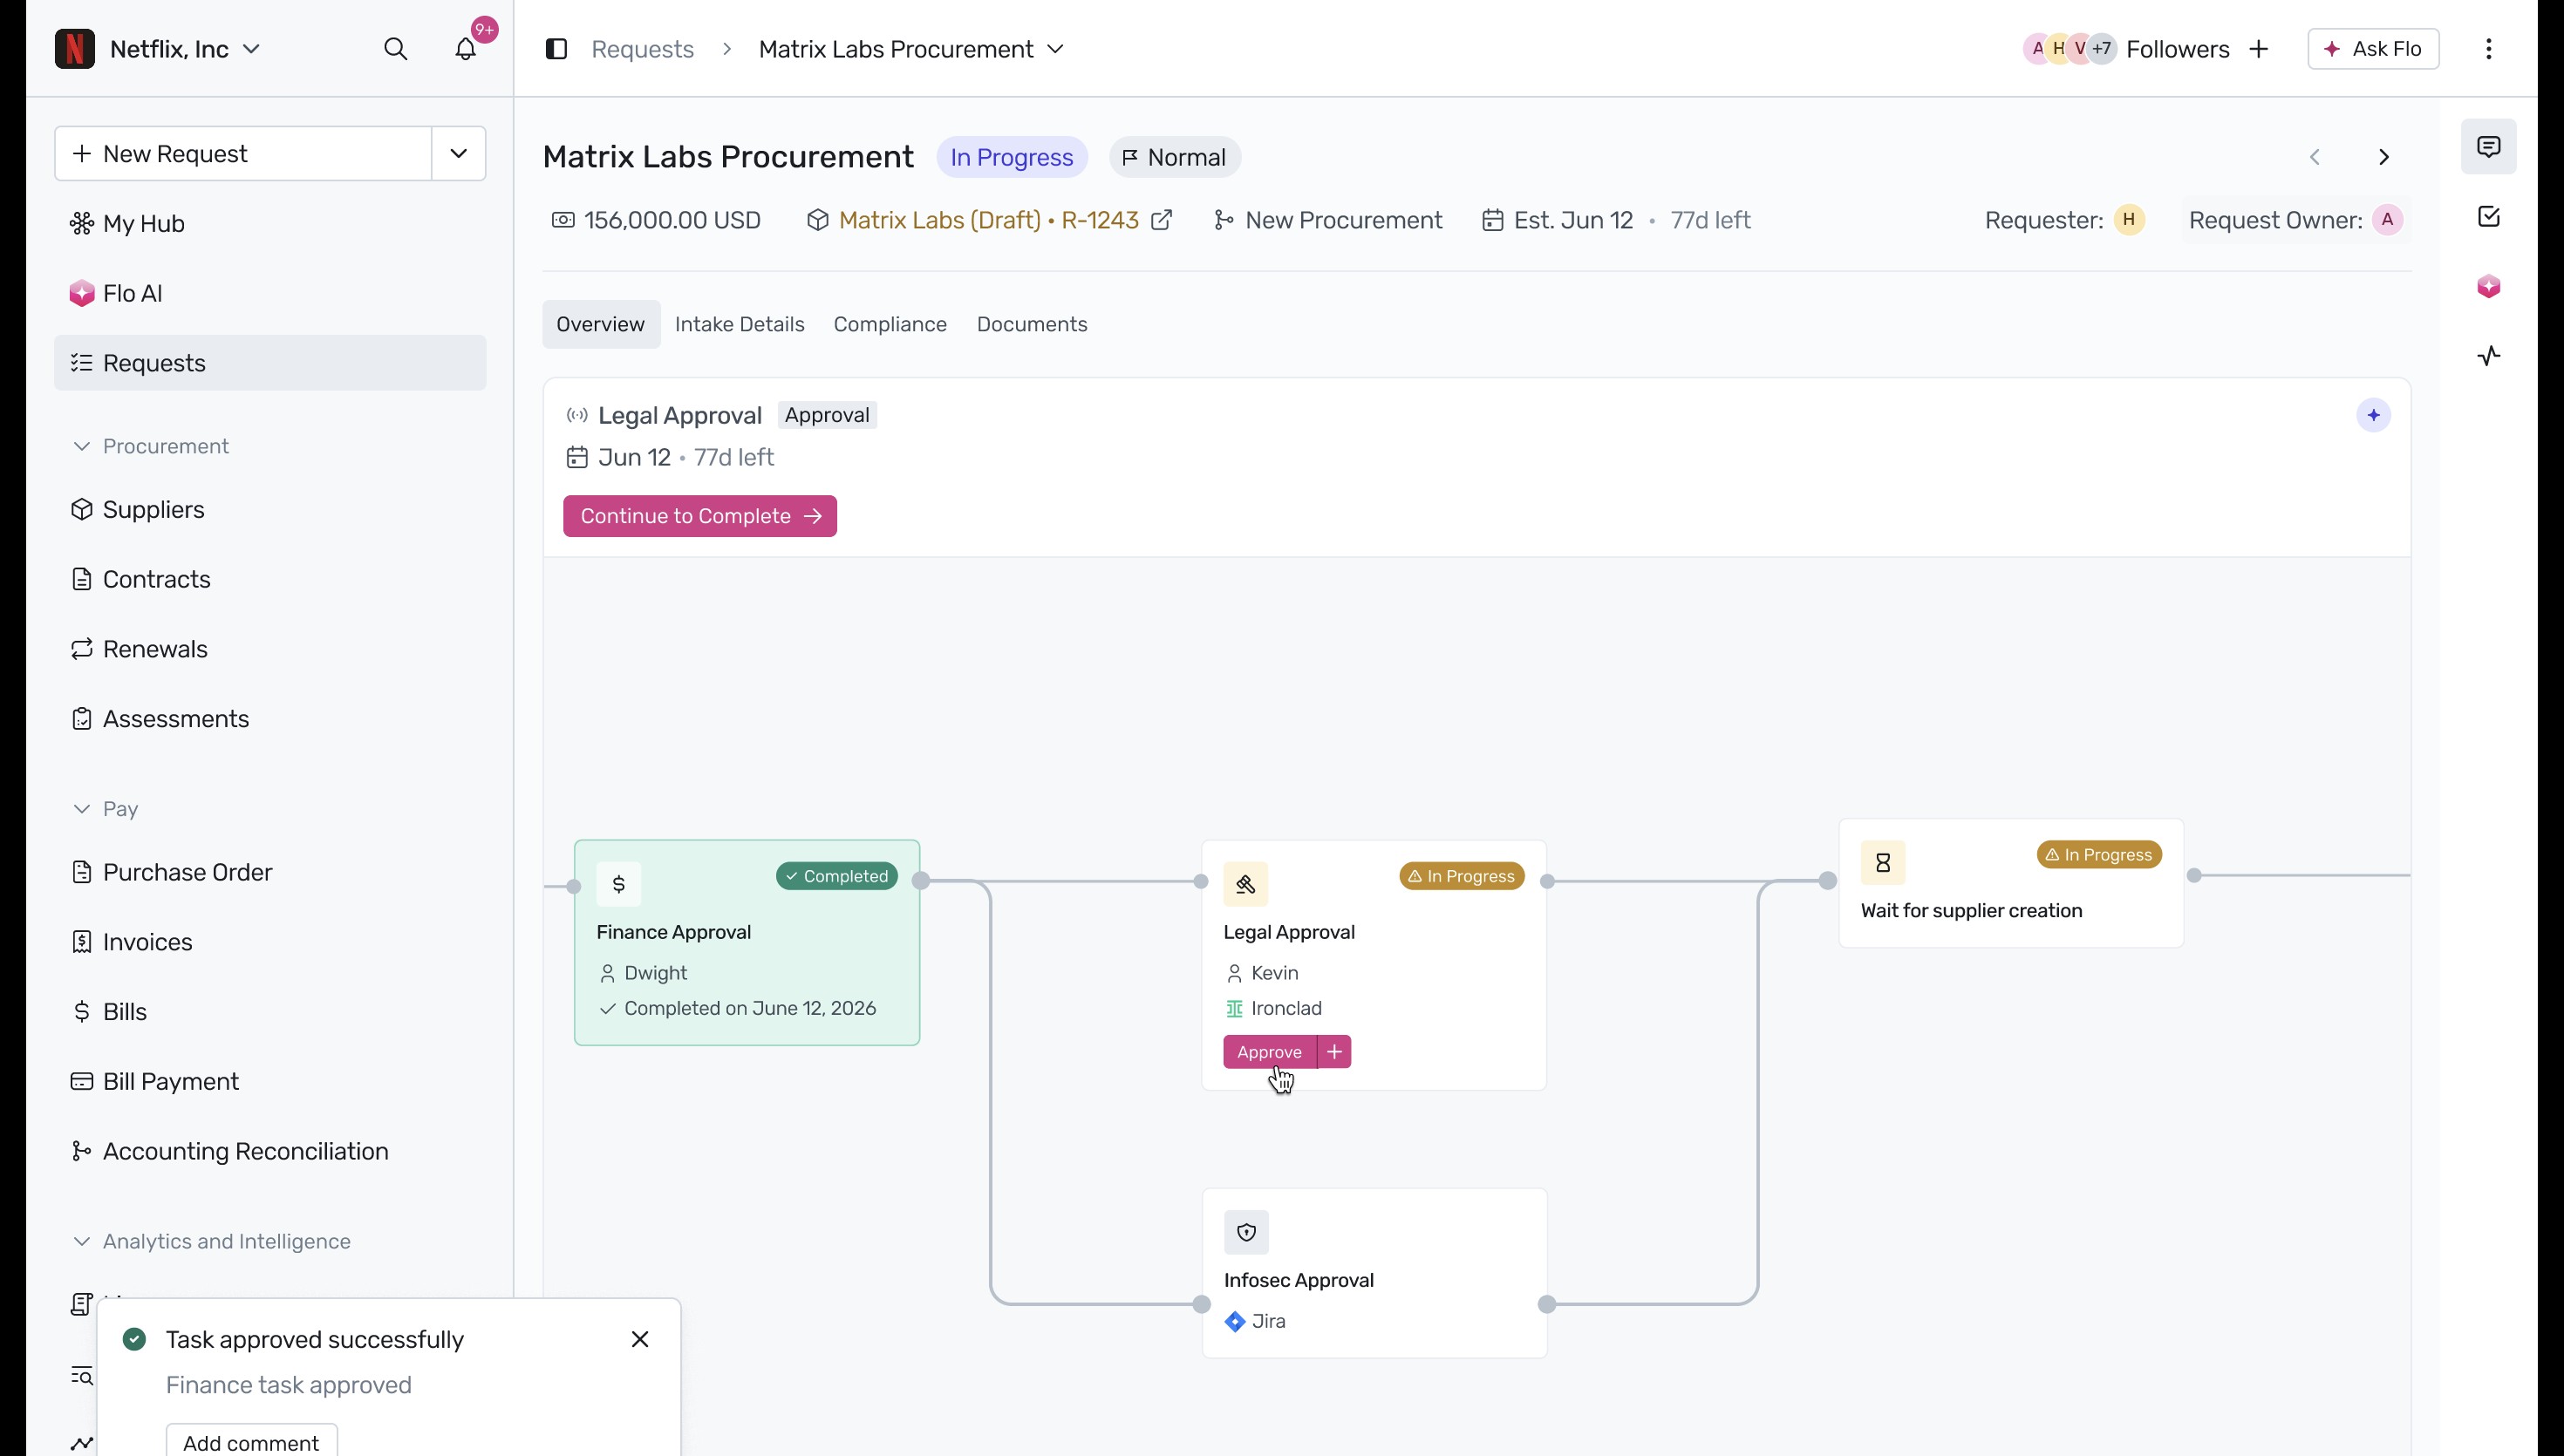
Once the finance task is approved successfully, the workflow moves forward. Click Approve on the Legal Approval card to initiate the contract review process.
The Legal Approval step integrates directly with Ironclad. You will be redirected to the Ironclad platform to prepare the contract. Click Tag documents for signature to set up the signature fields on the counterparty paper.

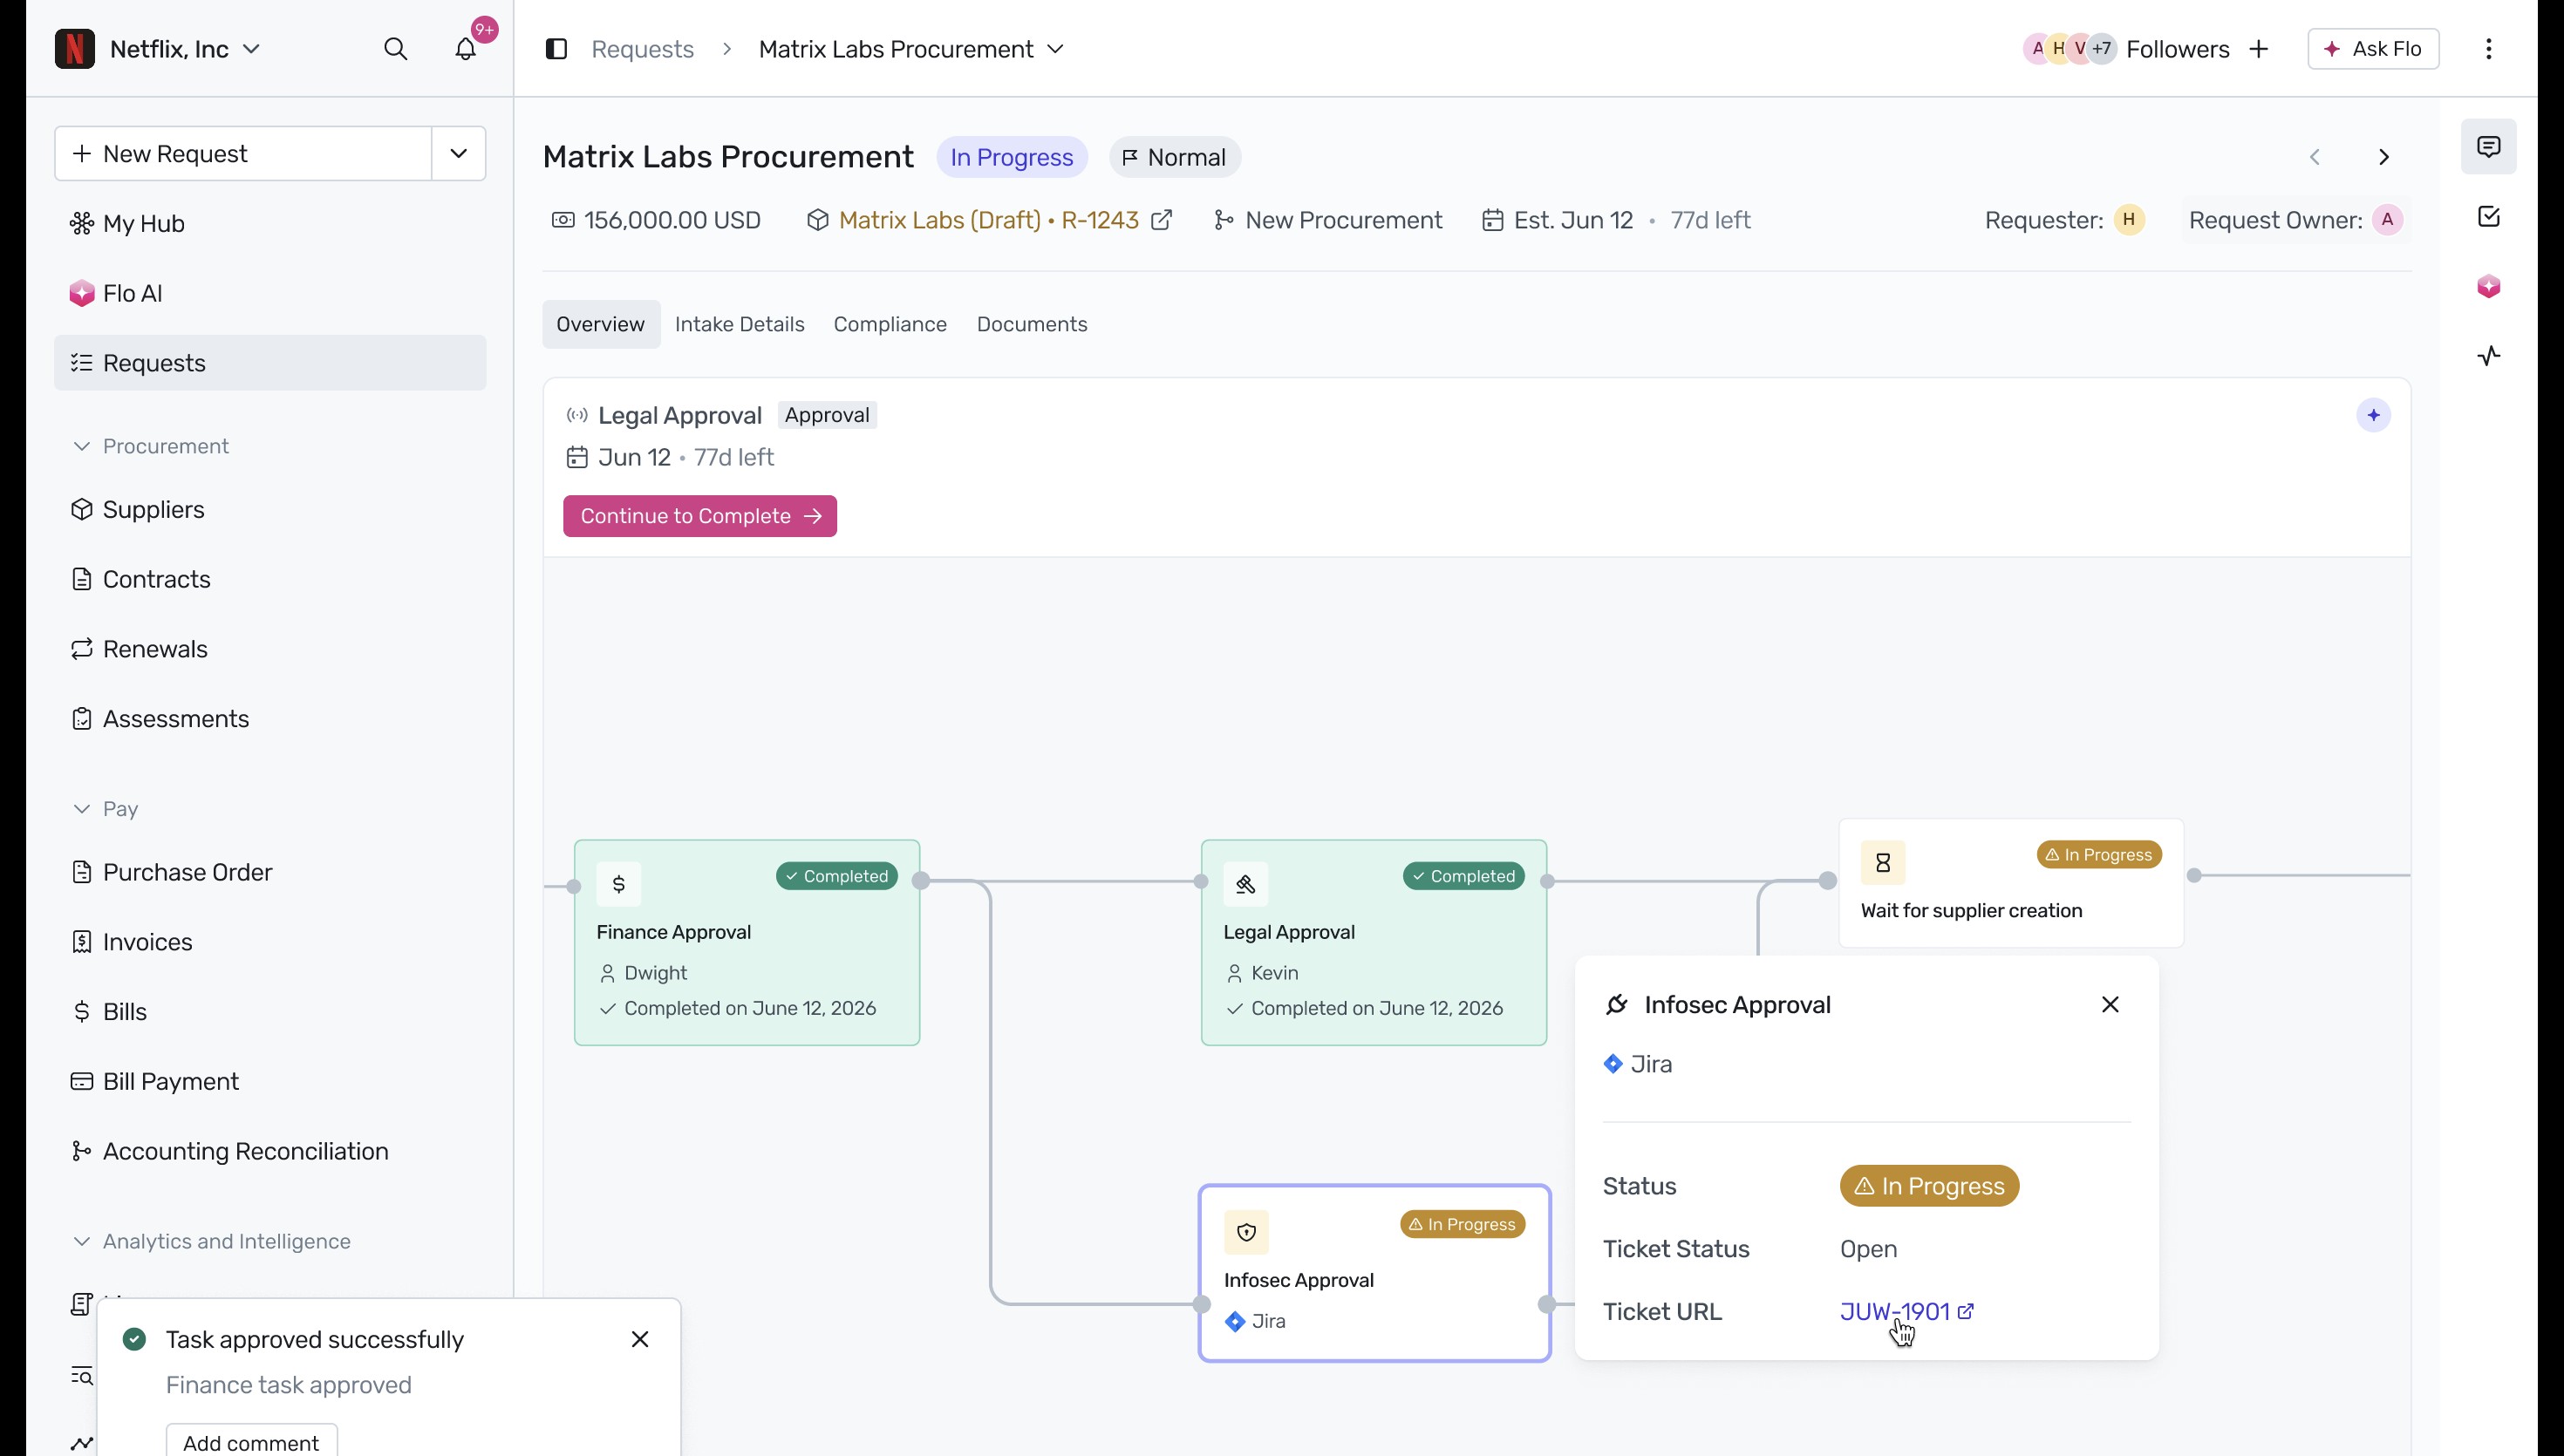
After legal approval is completed, the workflow proceeds to the Infosec stage. Click on the Infosec Approval card to view the integrated Jira ticket details. Click on the Ticket URL link to open the corresponding Jira issue.
In the integrated Jira interface, you can track, update, or resolve the security assessment ticket associated with the supplier onboarding request.

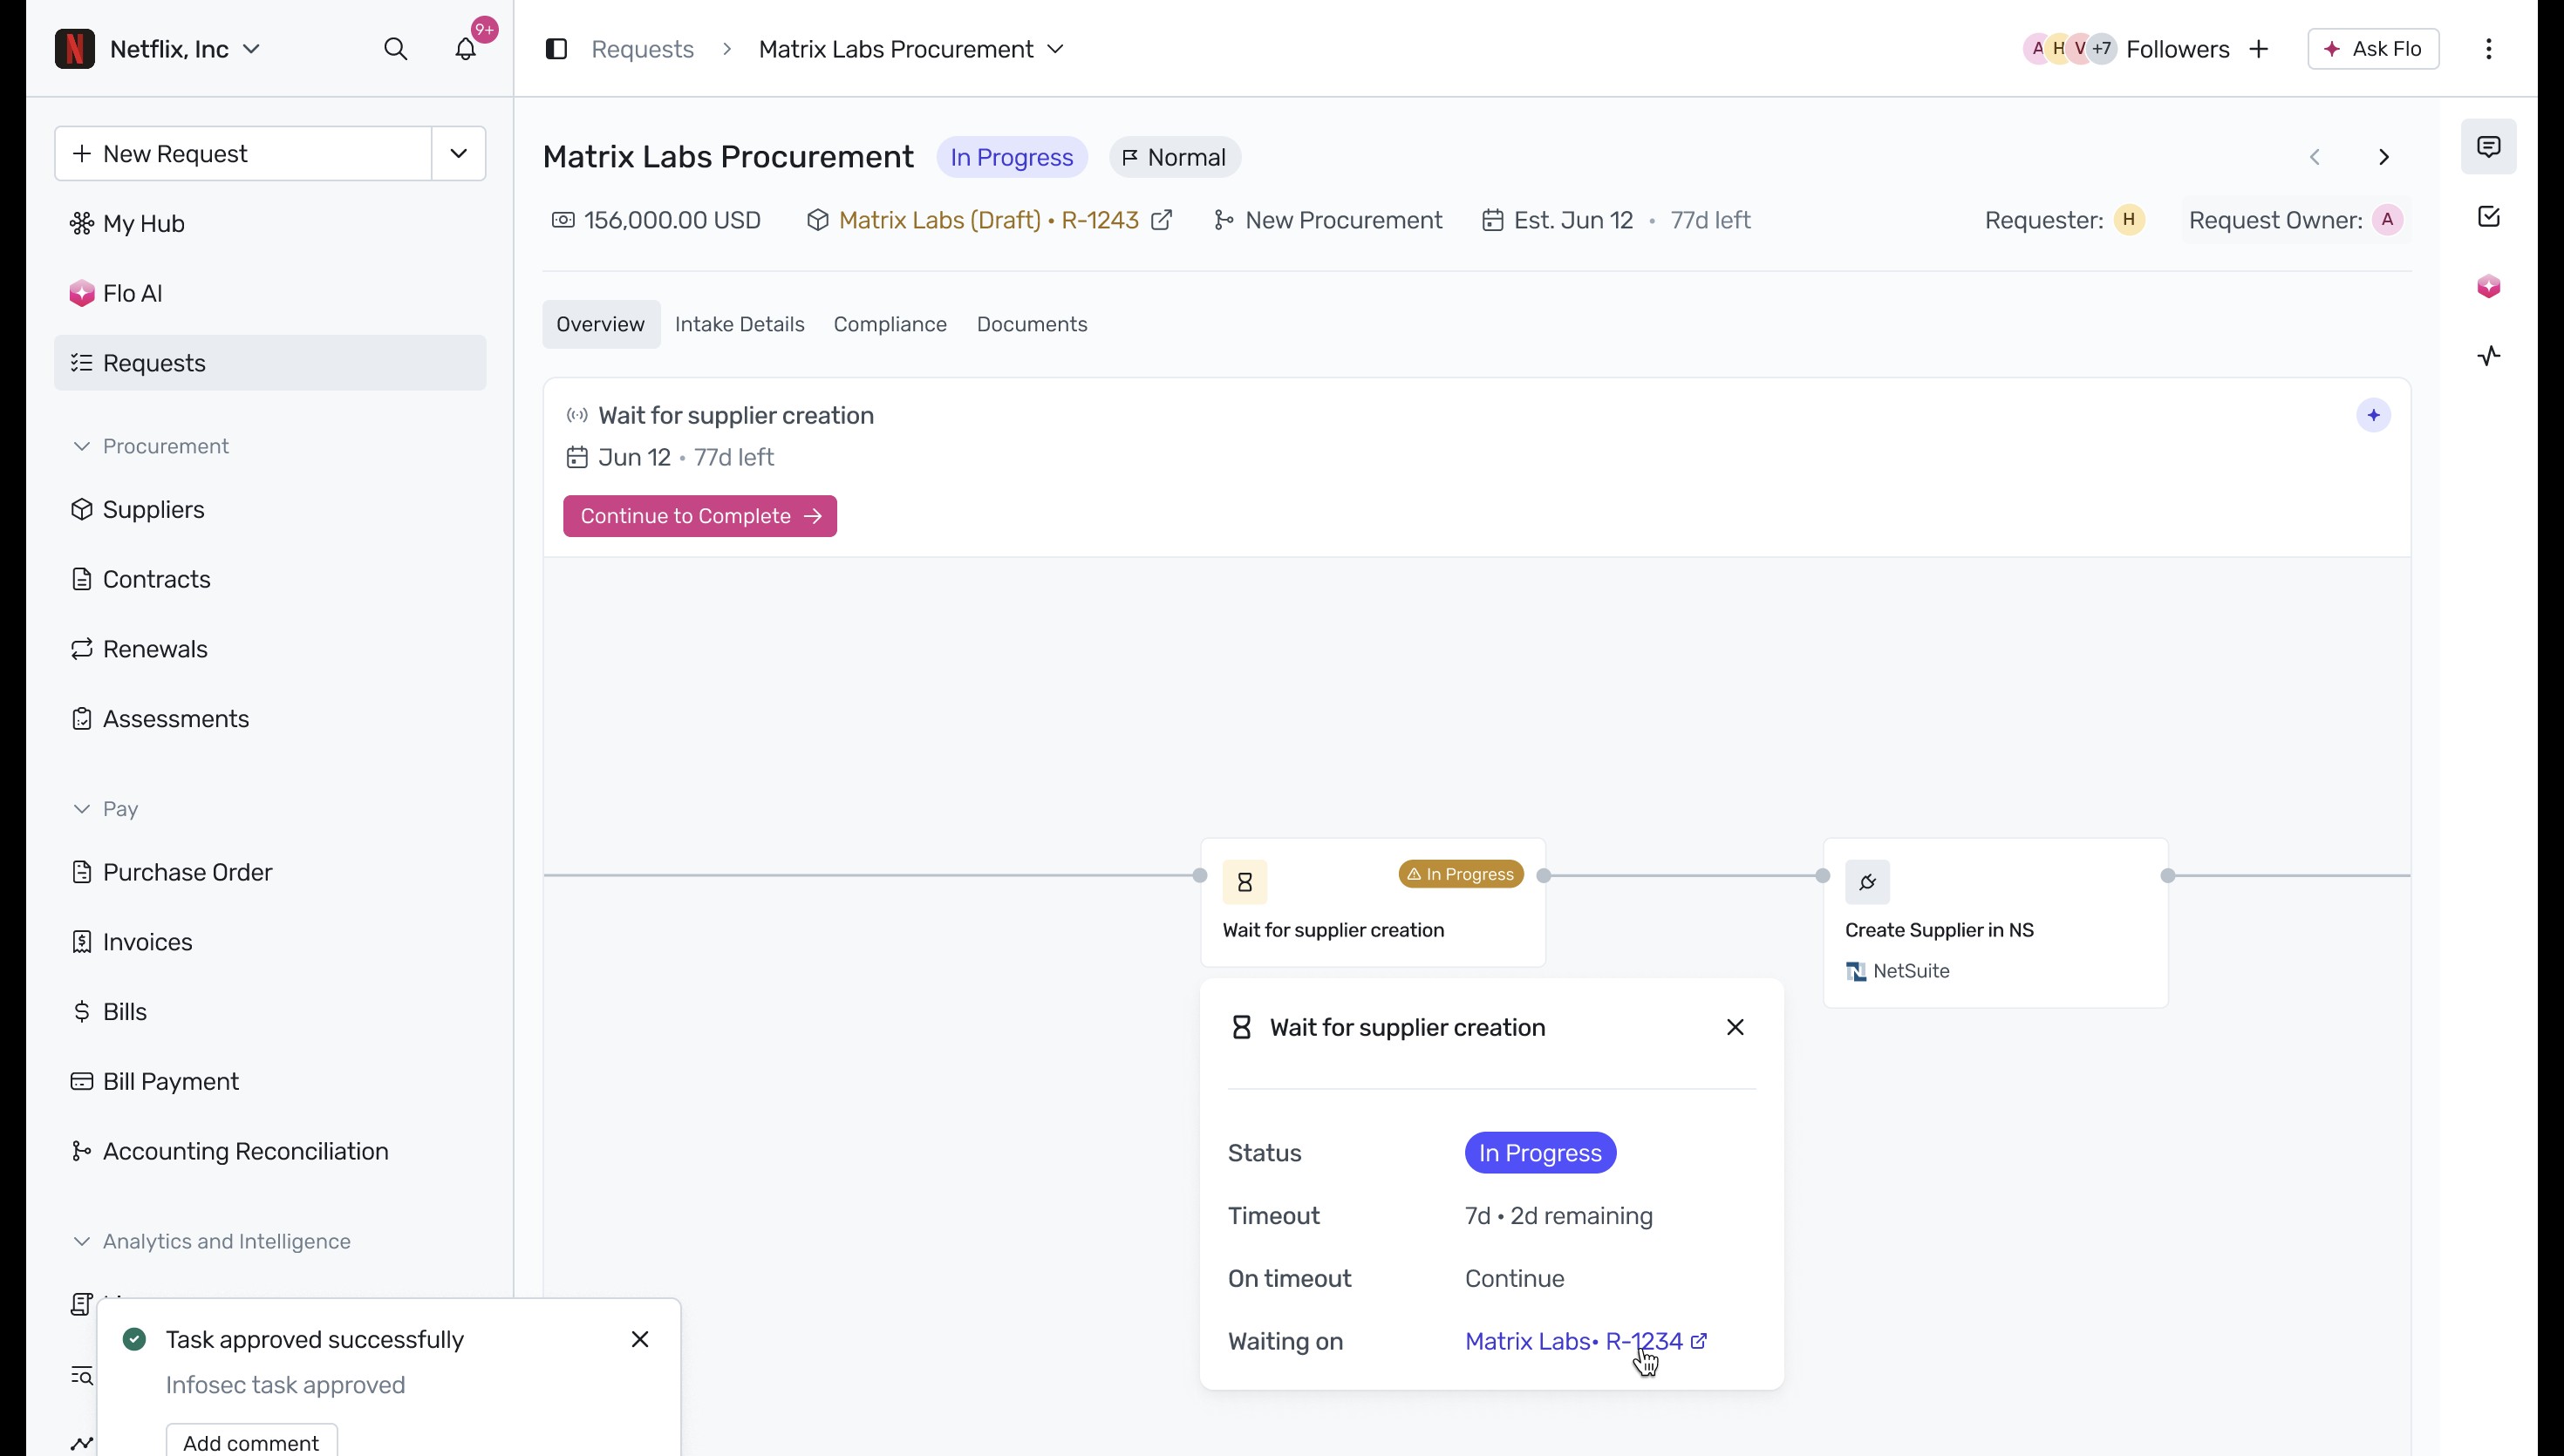
Once the preliminary approvals are underway, click on the Wait for supplier creation task card in the workflow and click the supplier link to manage the supplier's onboarding assessment.
On the supplier onboarding page, click View Assessment on the Supplier assessment card to review the questionnaires submitted by the vendor. For more information on managing vendor risk questionnaires, see Processing a vendor assessment review and About vendor assessments.
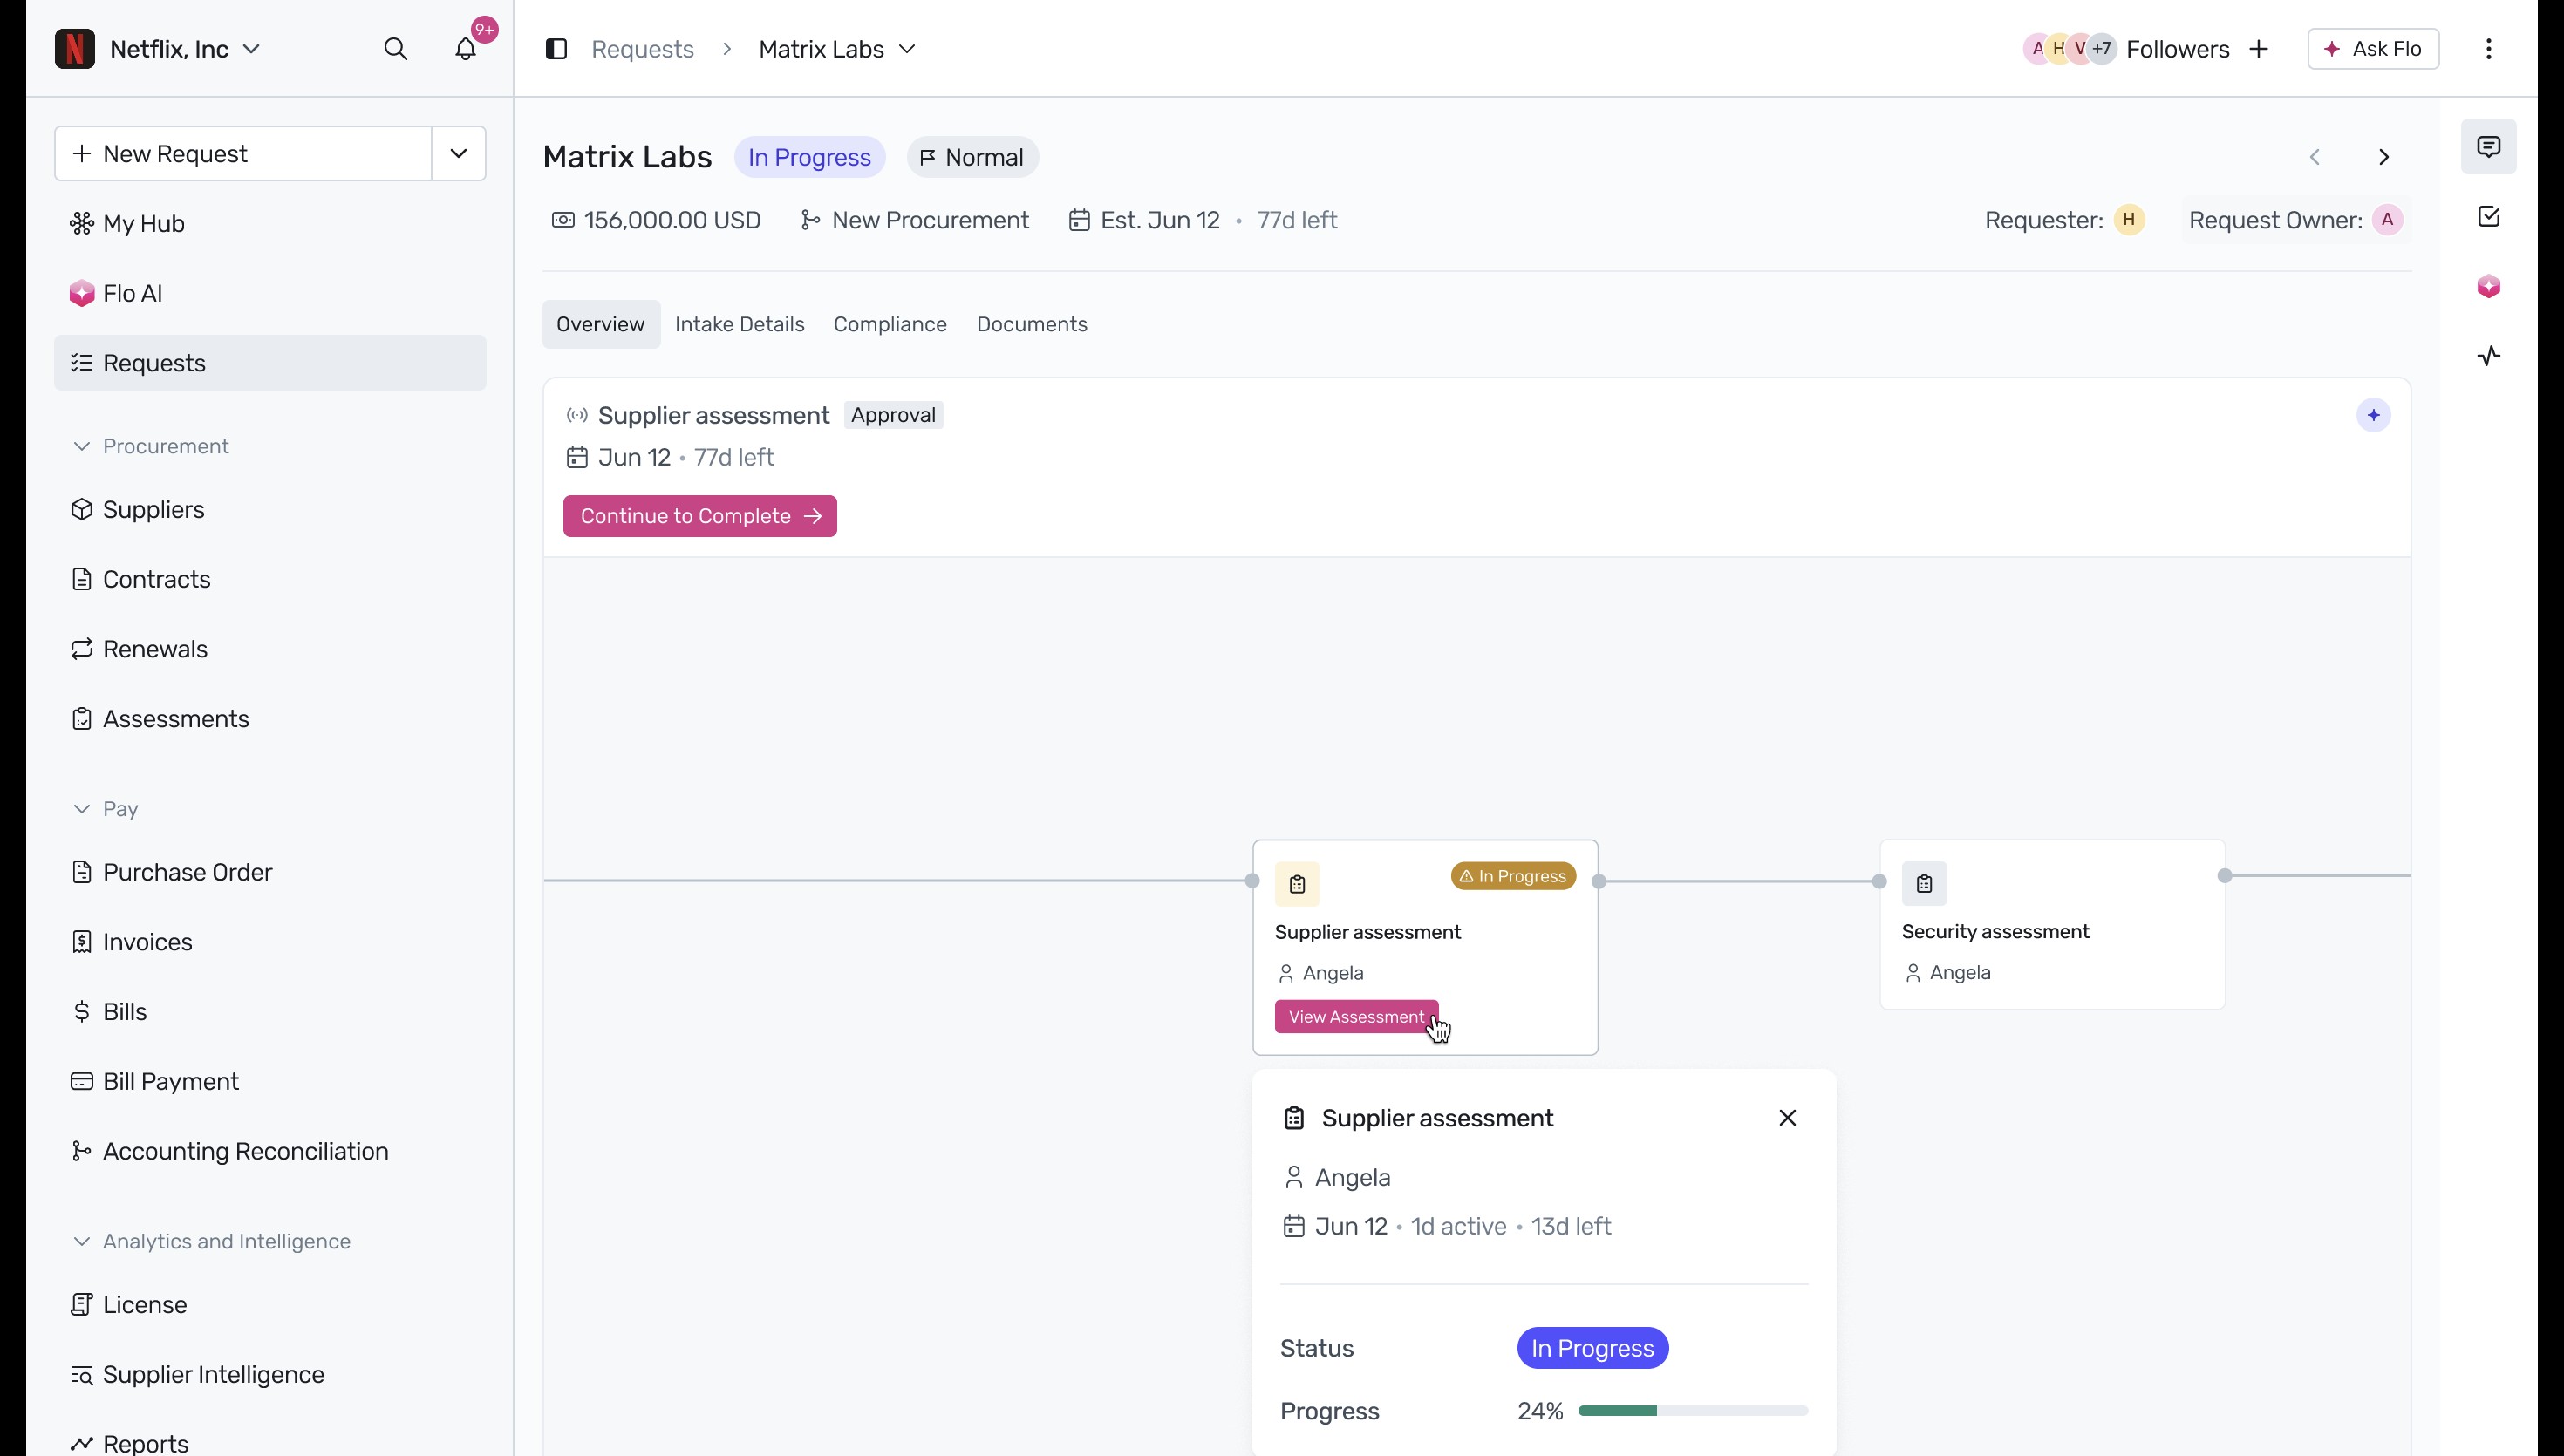
In the Supplier assessment portal, review the company information and compliance certifications. To flag a specific response for clarification, click the Flag icon next to the response field.
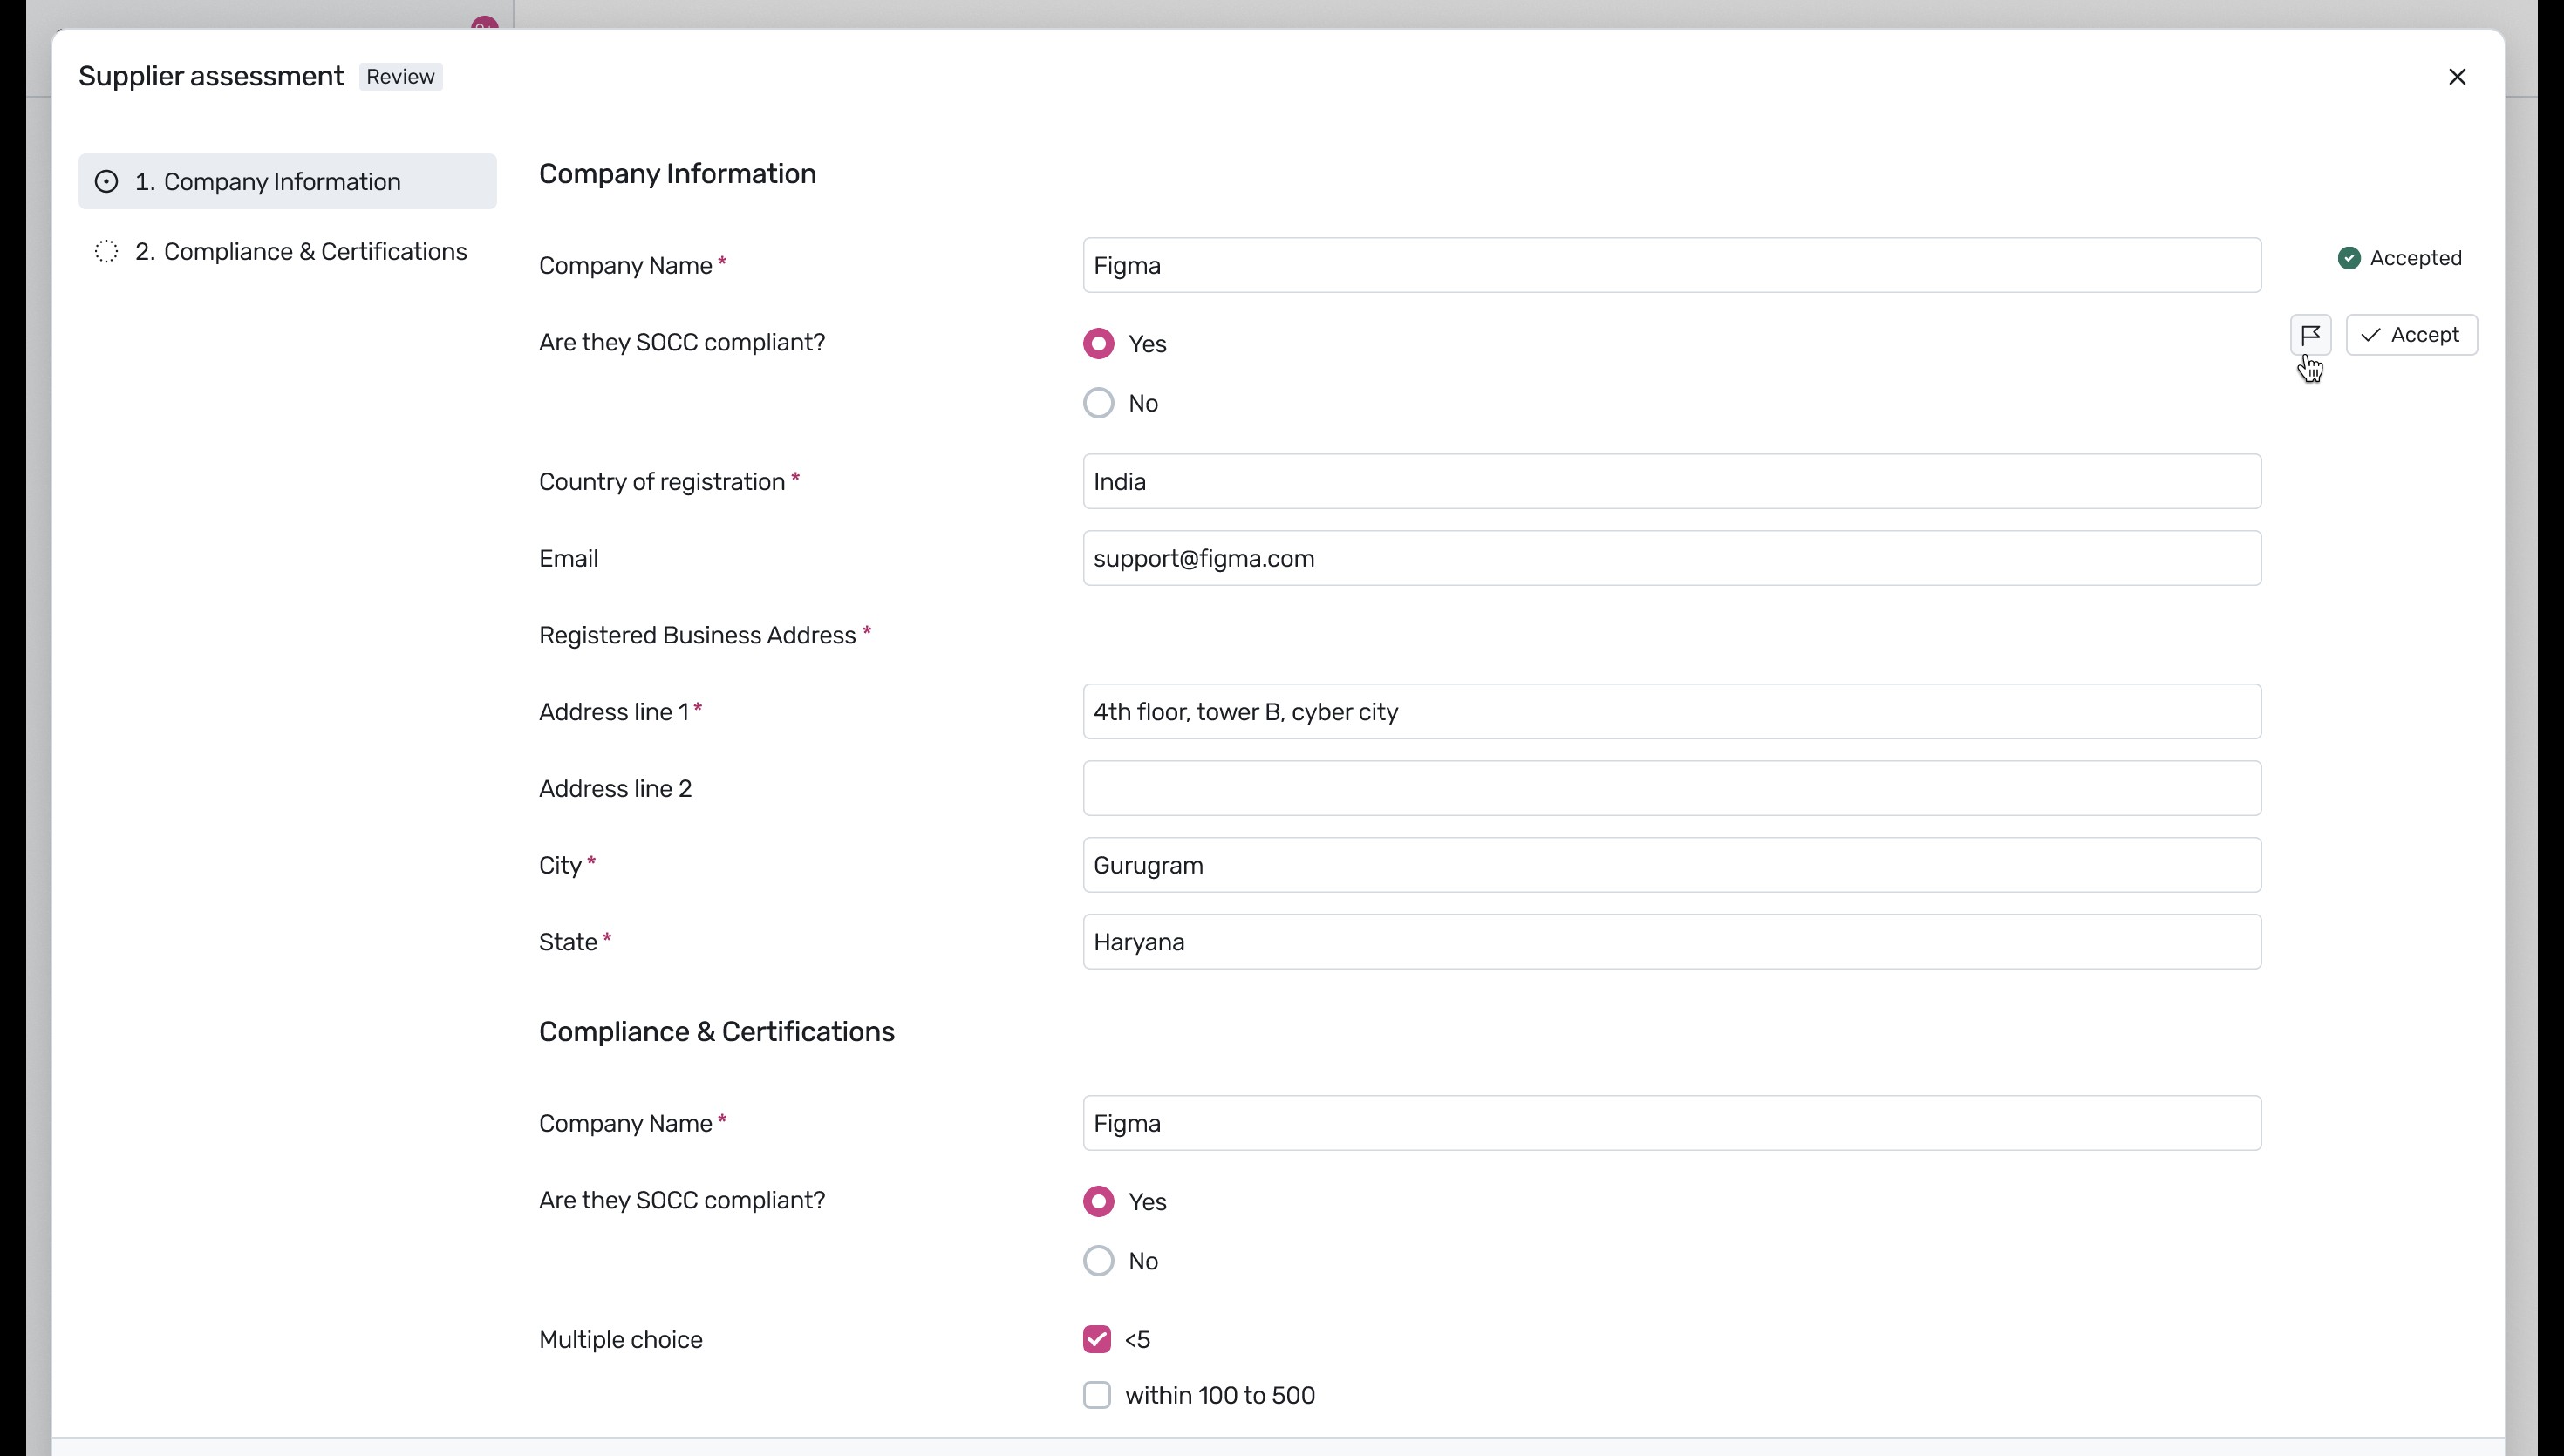
In the Flag response dialog, enter the reason for flagging the response (e.g., 'Need clear information') and click Add.
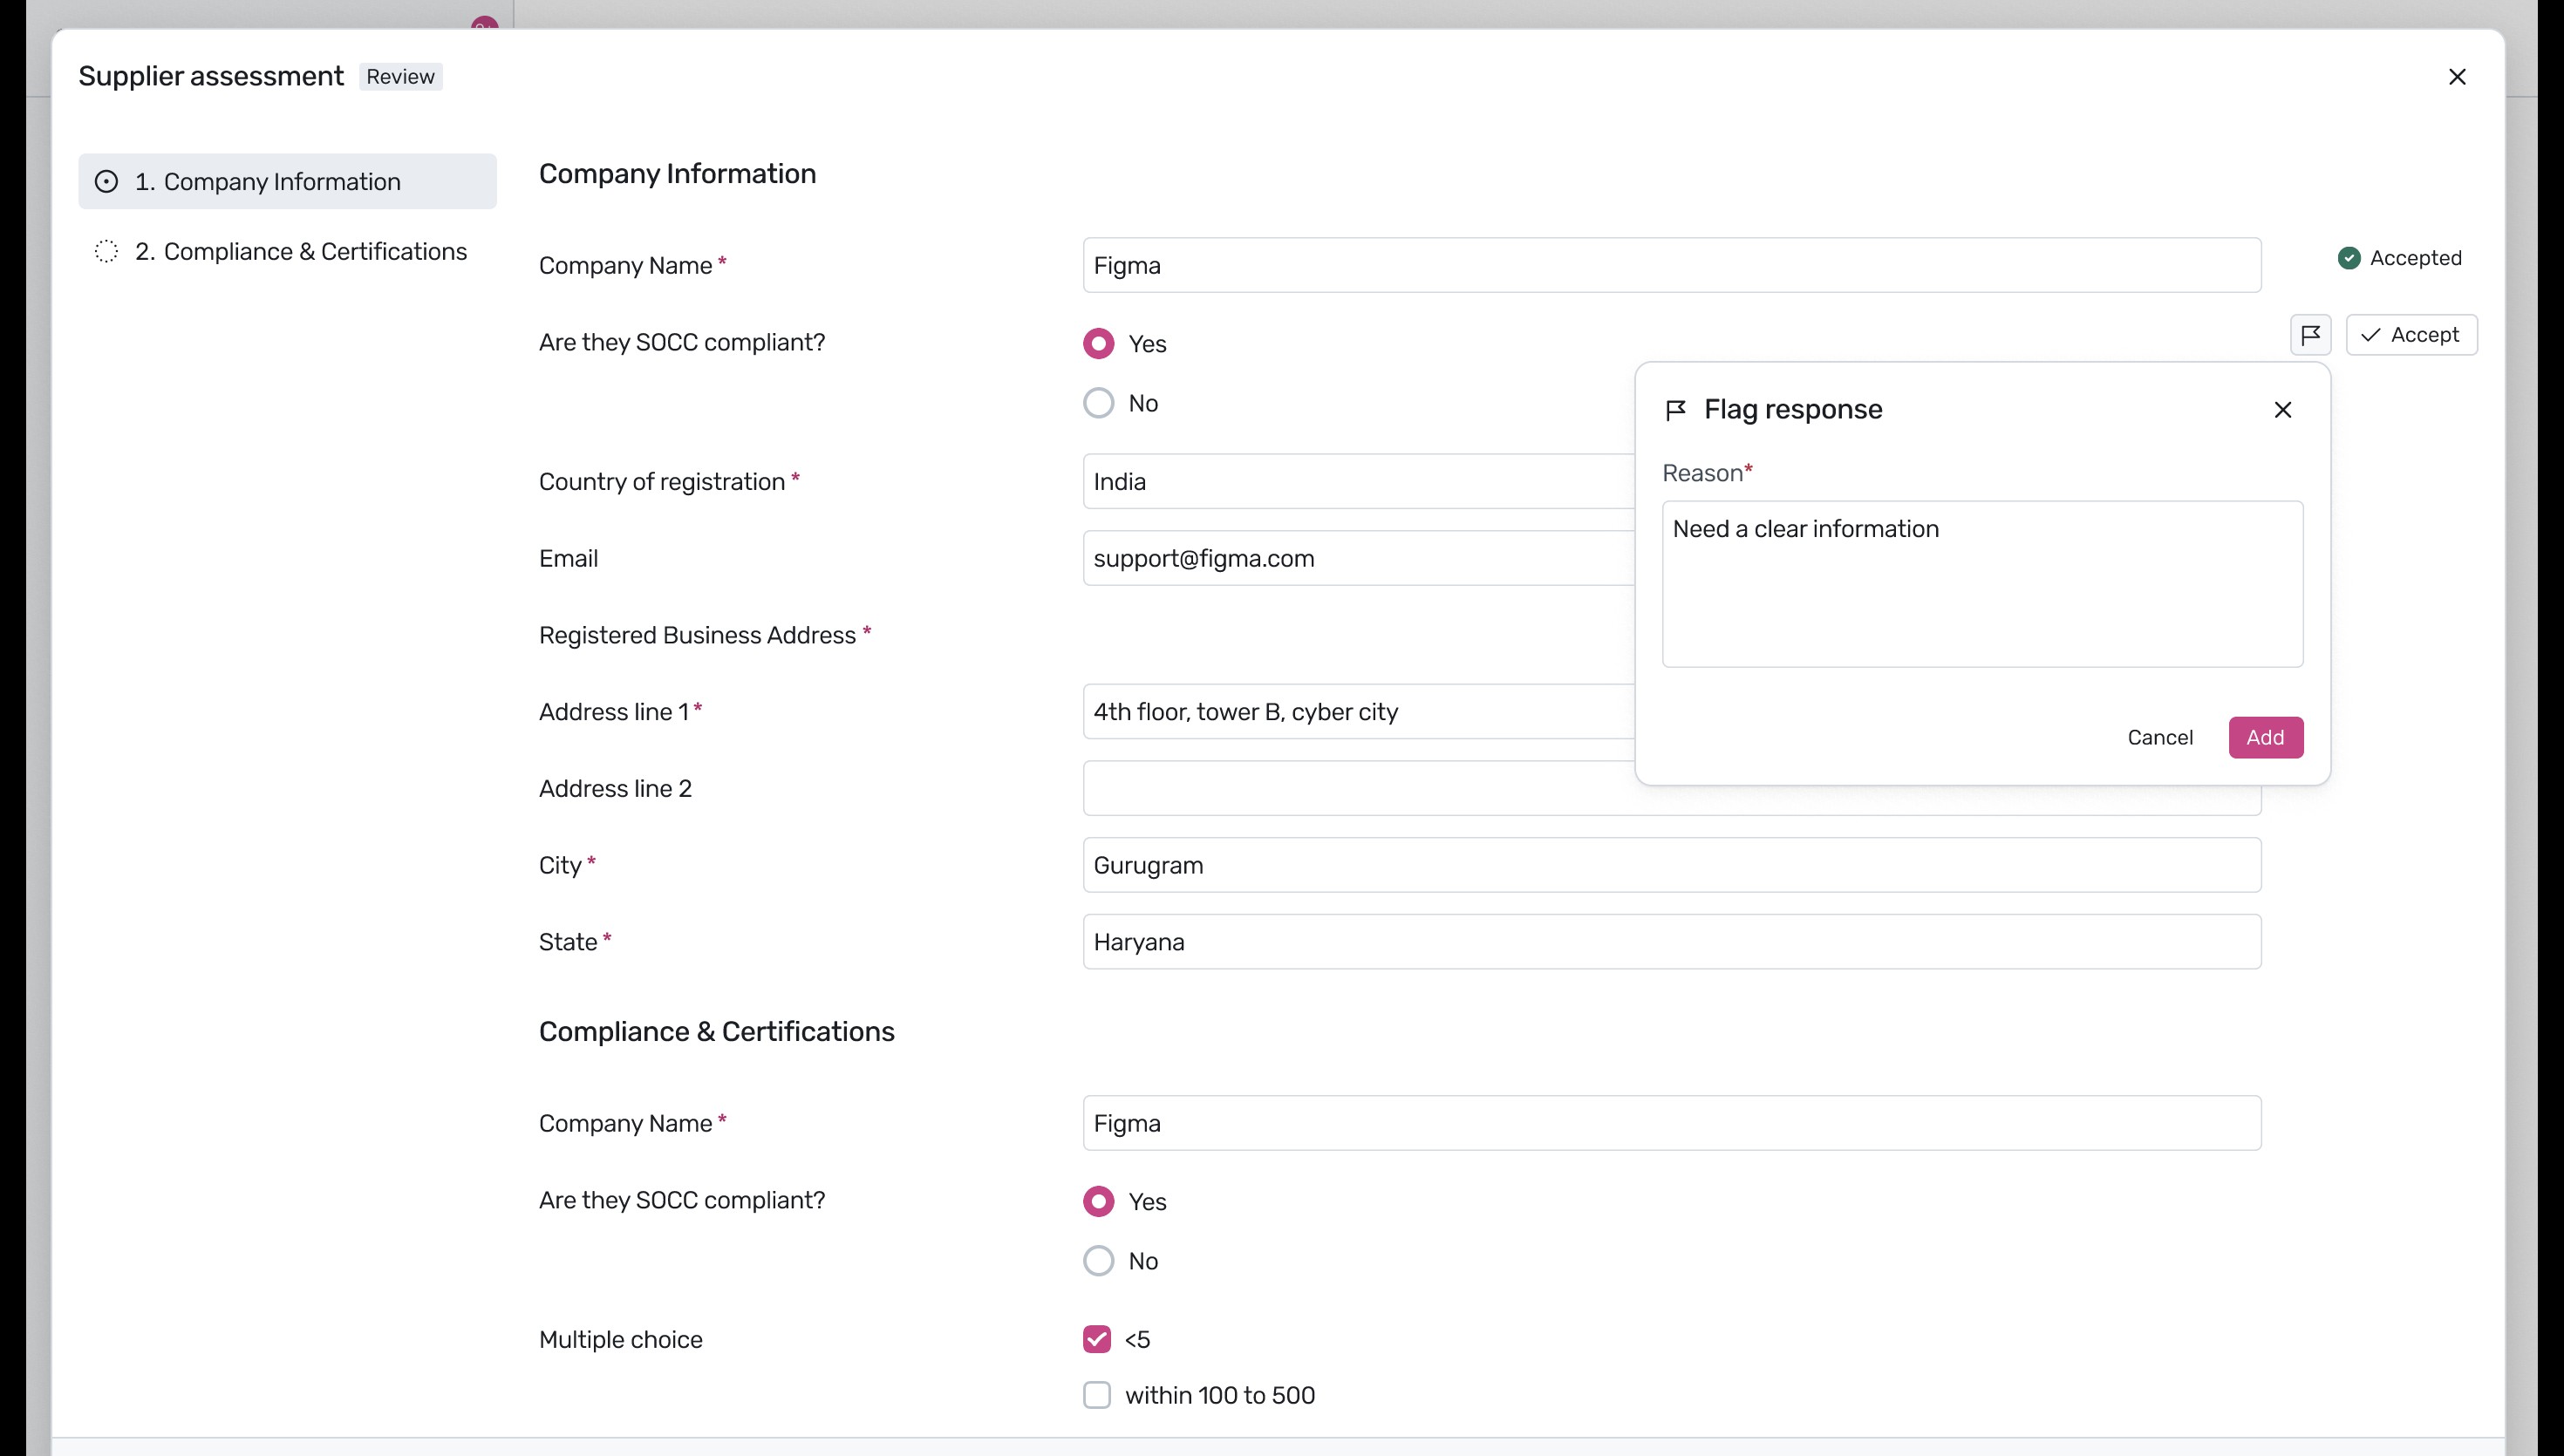
Once flagged, the status next to the specific question will update to Flagged, allowing the supplier to provide the necessary clarifications.
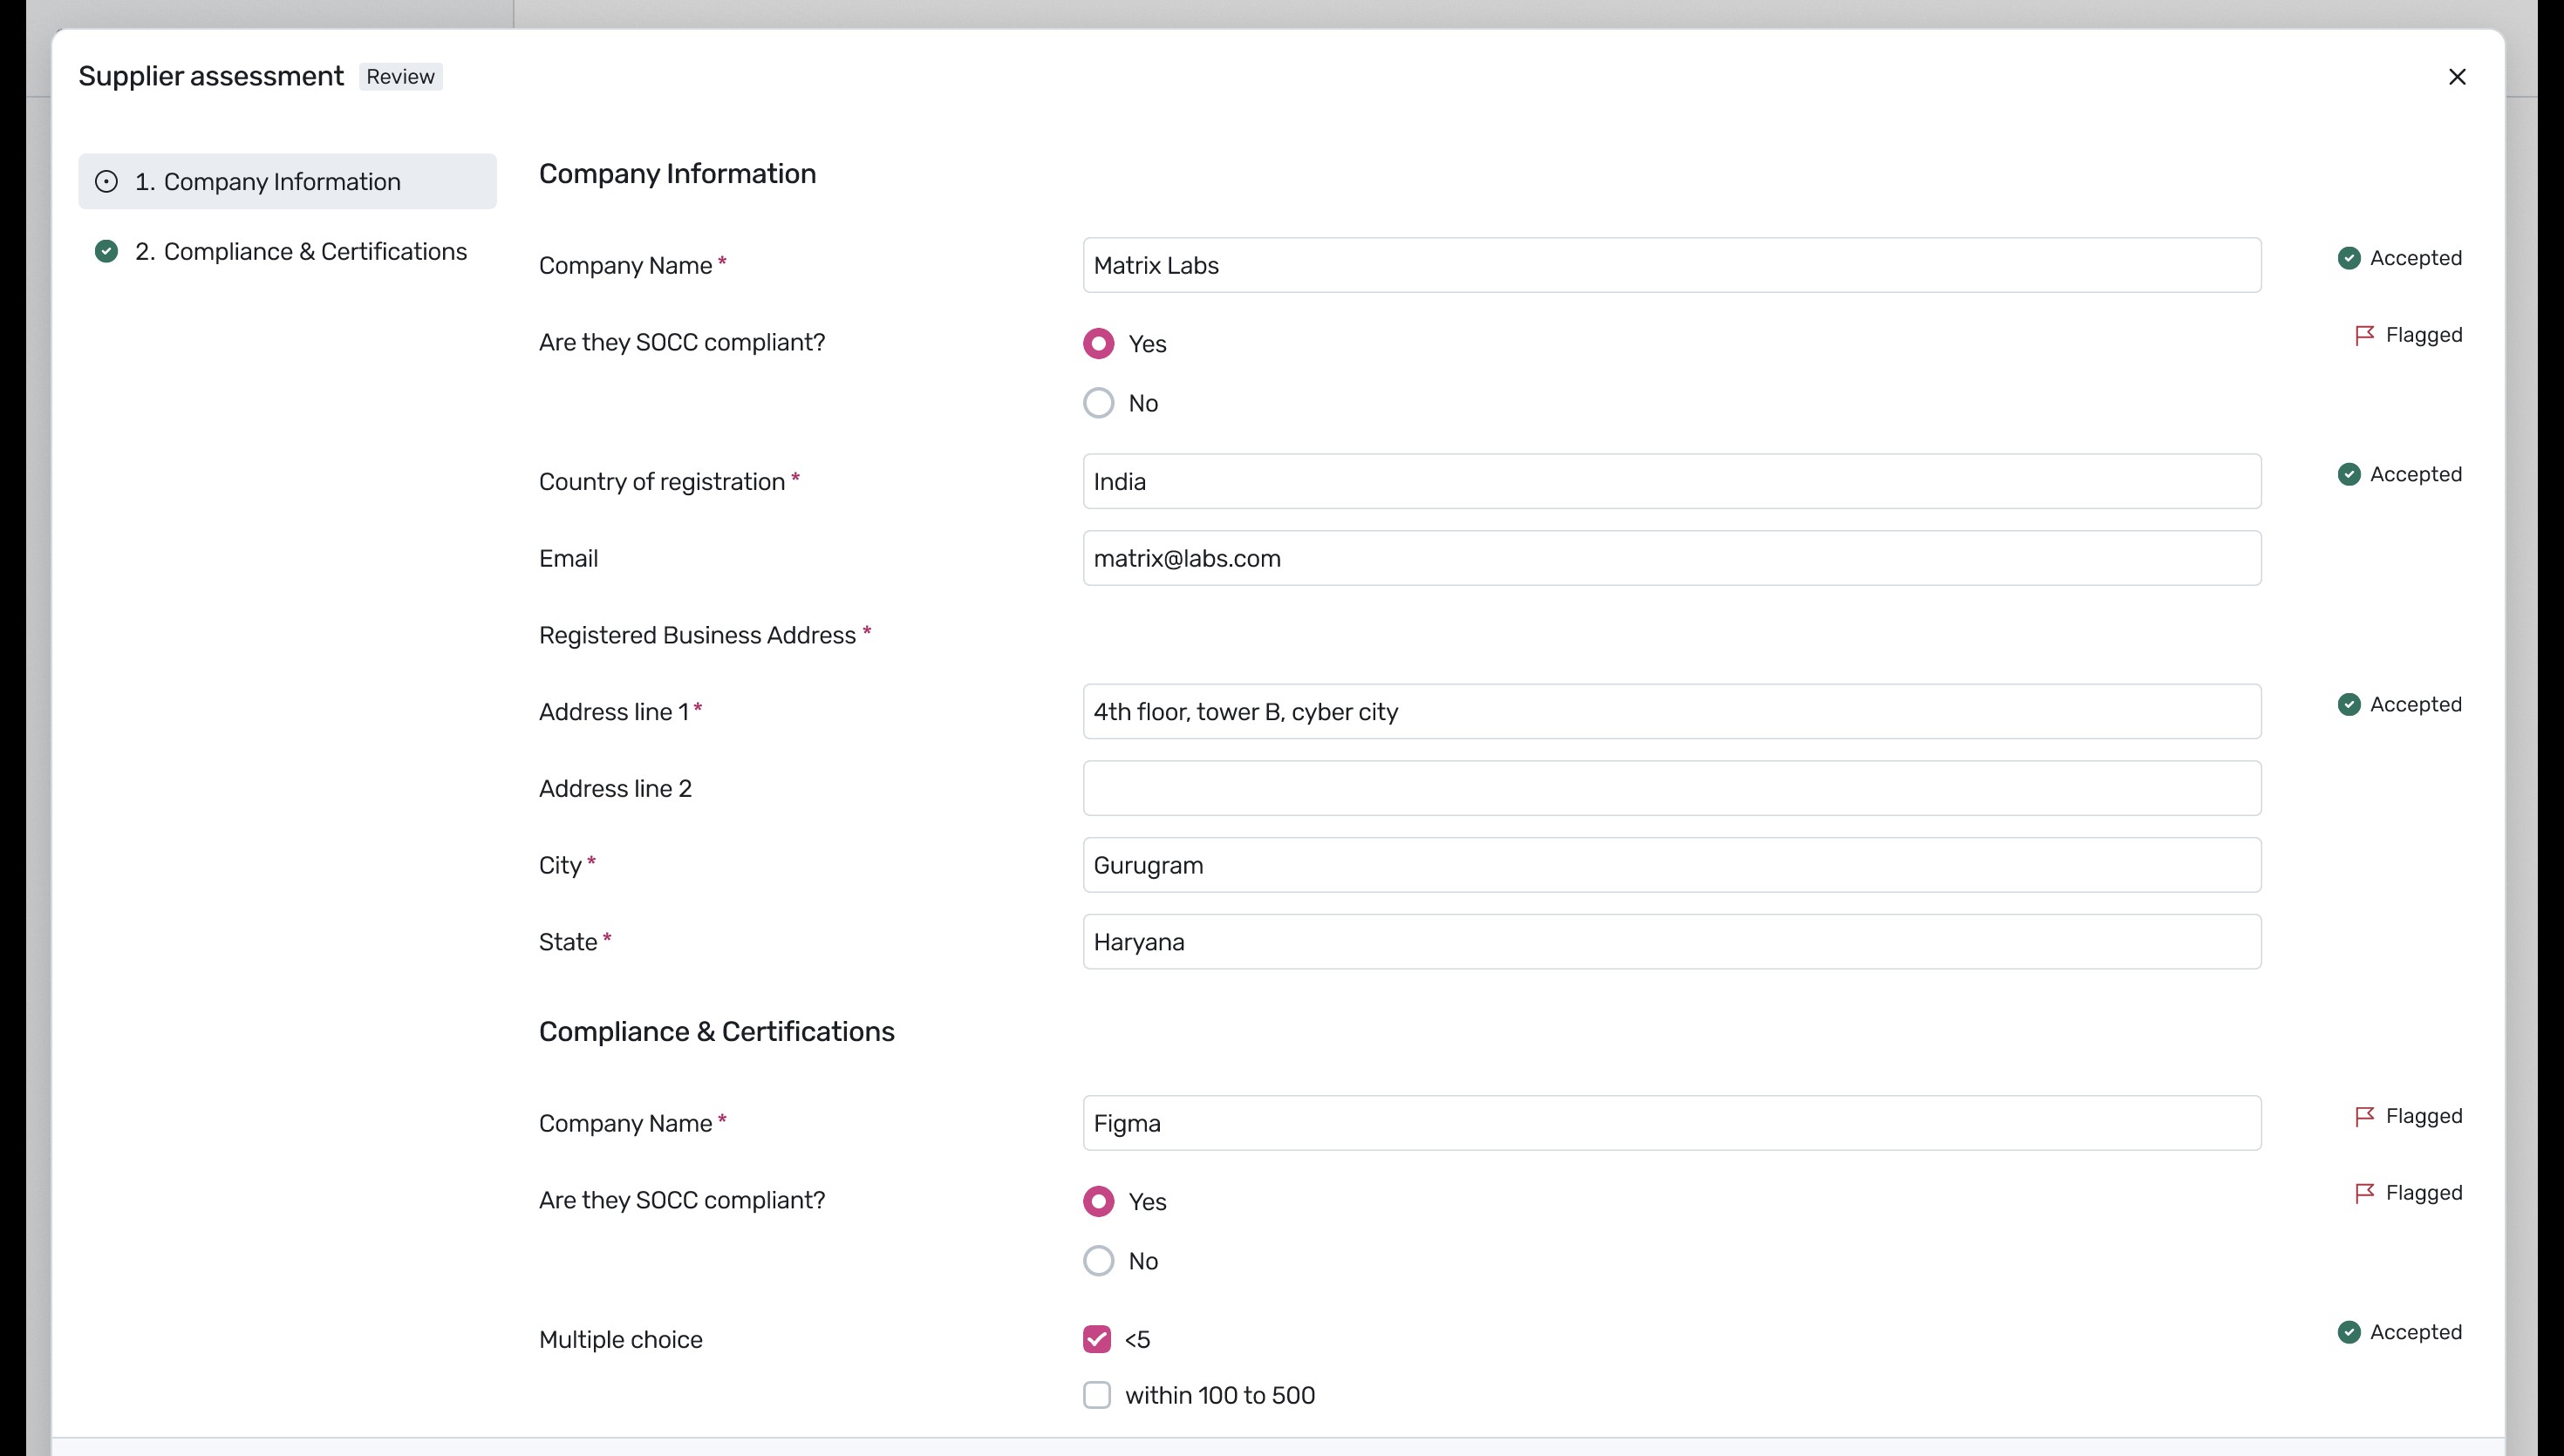
After completing the assessments, return to the procurement request. Click View Request to return to the integration workflow.

Click on the Create Supplier in NS card and click the Supplier URL link to verify that the supplier has been automatically created in NetSuite. For details on how Spendflo syncs data with NetSuite, see Netsuite ERP Integration.

The link redirects you to NetSuite, where you can verify the automatically generated vendor profile and its primary information.

Next, click on the Create PO in NS card in the Spendflo workflow and click the PO URL link to inspect the automatically generated Purchase Order.

This opens the corresponding Purchase Order record in NetSuite, showing its details and its status as 'Pending Approval'.

With the NetSuite integrations complete, click Continue Task on the Send Documents for Signature card to initiate the e-signature process. For more information on e-signatures, see Docusign Direct Integration.

In the document dispatch modal, select the document to sign, verify the recipient information and signing order, customize the email draft, and proceed.

You will be redirected to the DocuSign editor. Drag and drop the Signature field onto the designated signature line of the document, then click SEND.
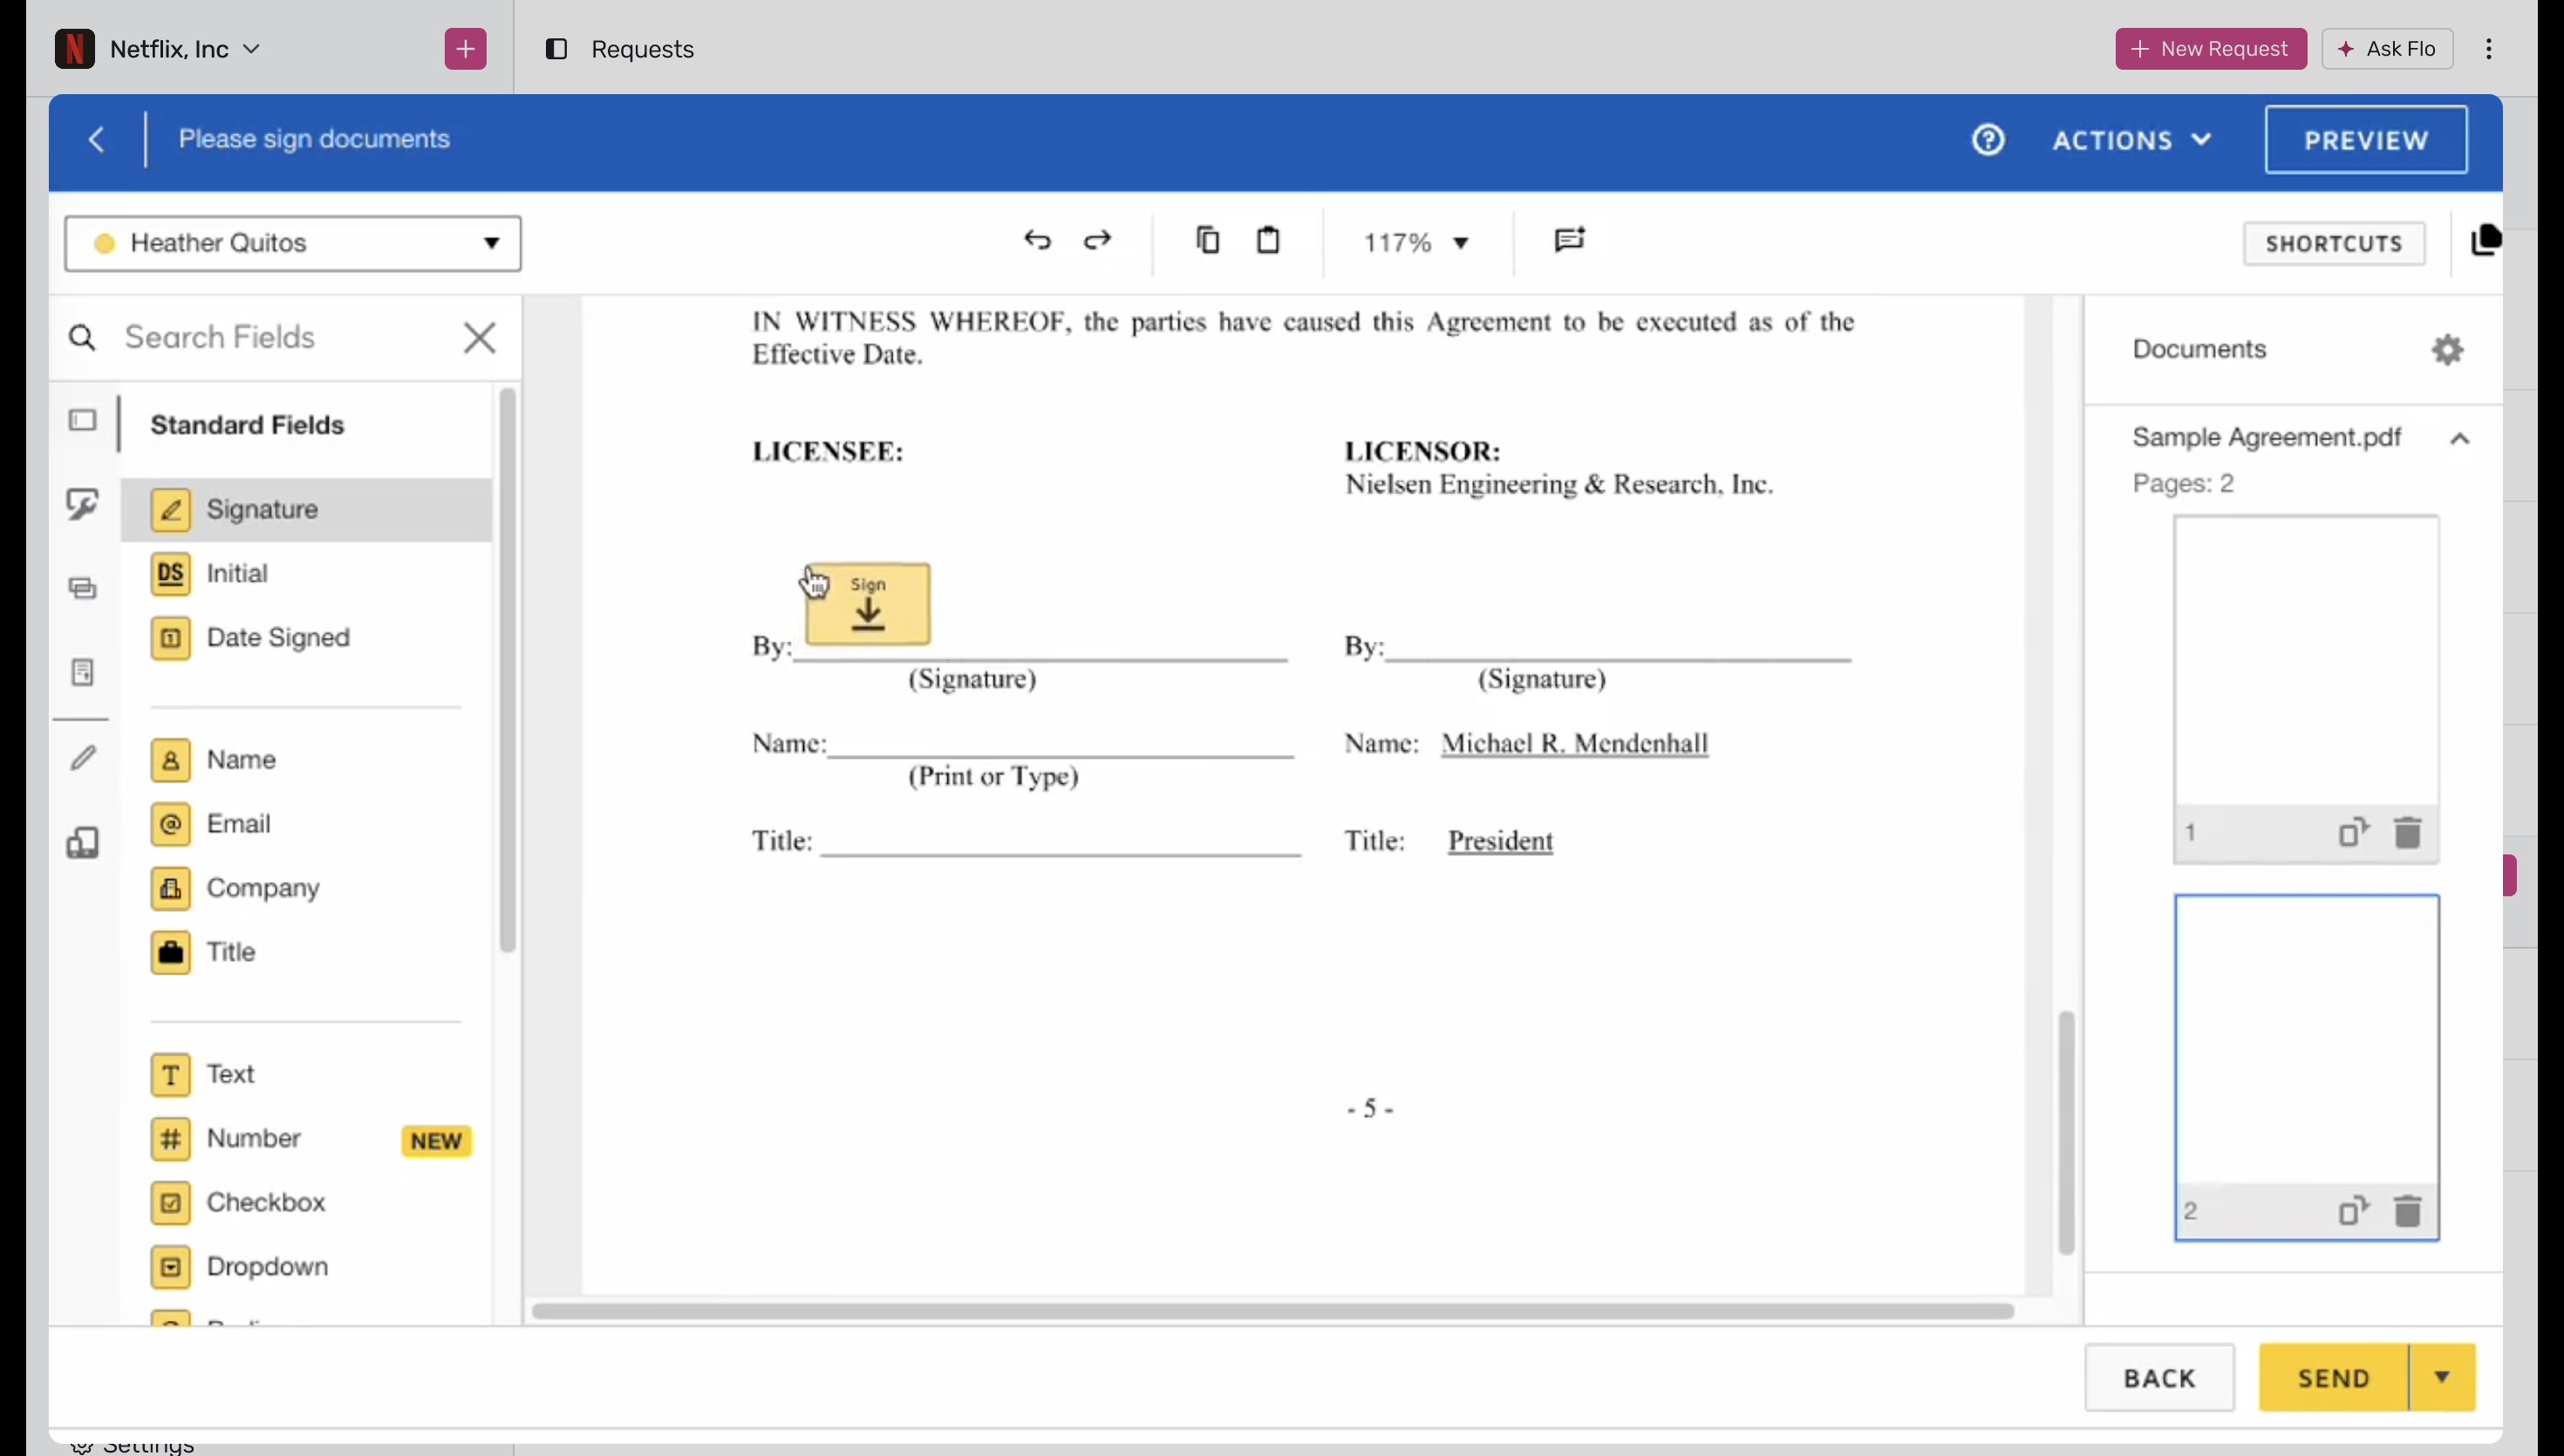
Wait for the document sending process to complete.

Back in Spendflo, the status of the Send Documents for Signature card will update to Sent. Click Continue Task to monitor or complete the signing process.

The DocuSign signing interface will load for the recipient.

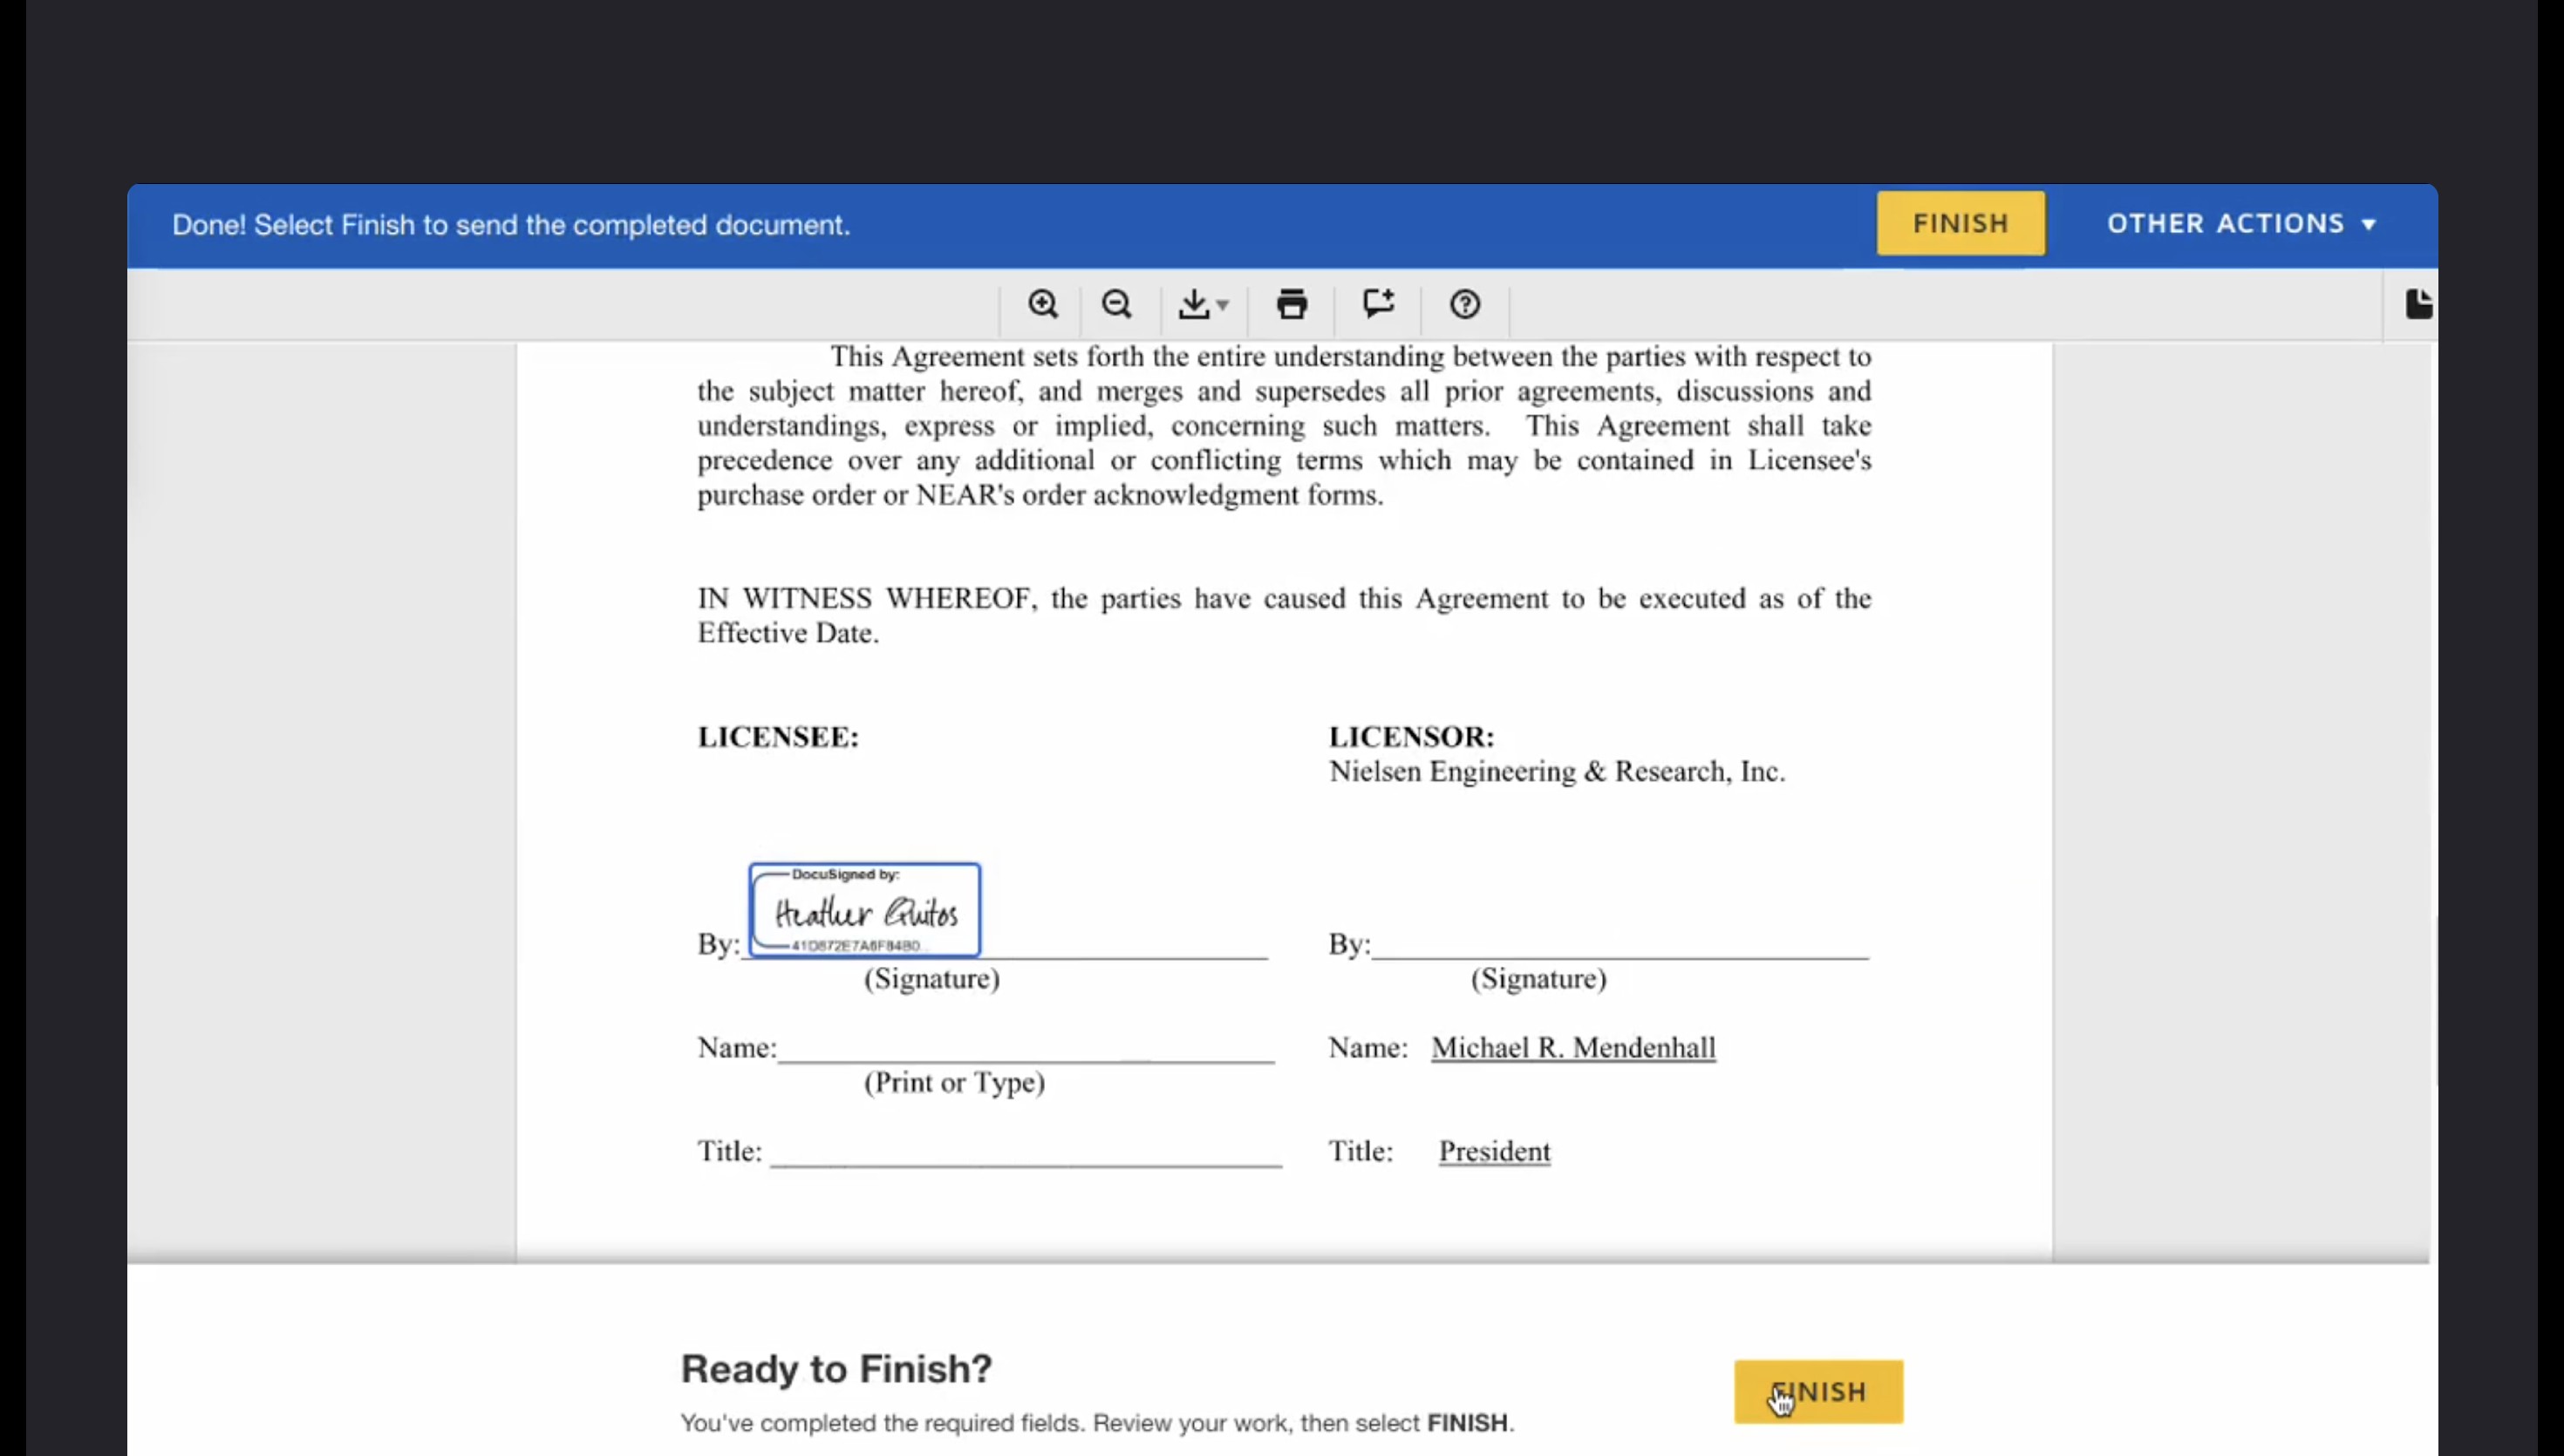
The recipient reviews the document and clicks the Sign tag to apply their electronic signature.

Once the signature is applied, the recipient clicks FINISH to complete the signing process.
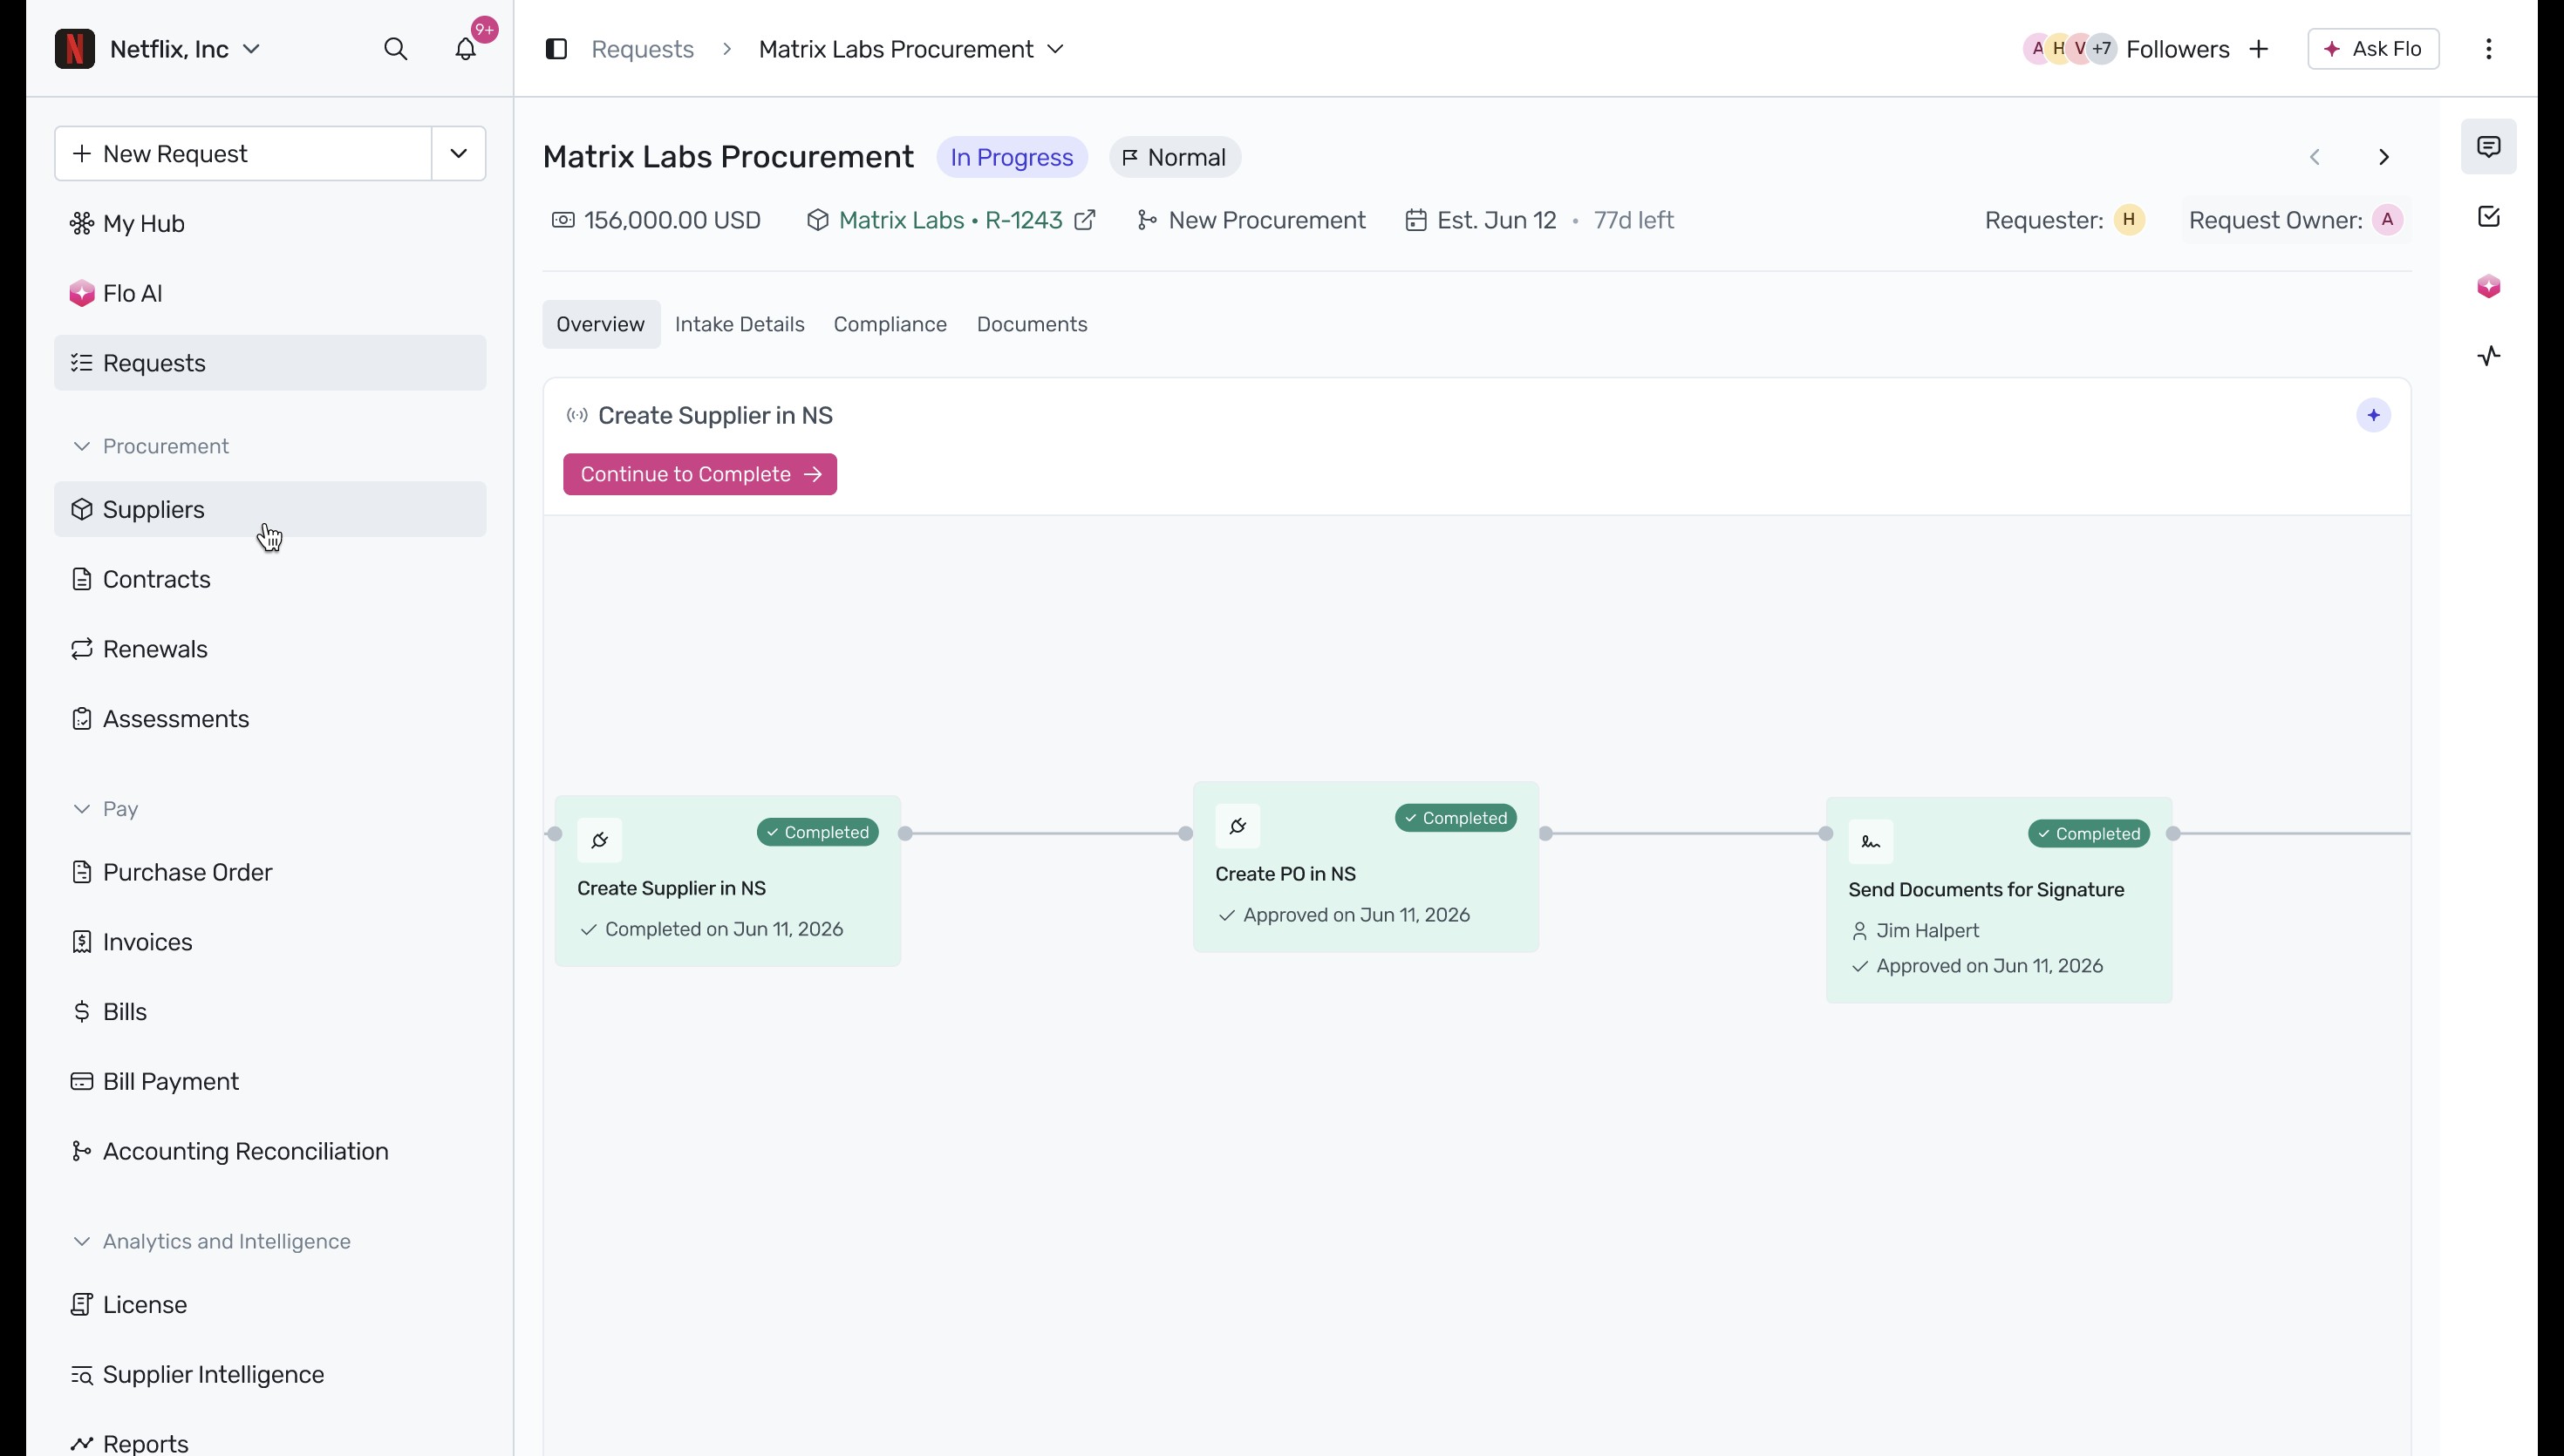
Back on the Spendflo platform, all integration and signature tasks will now display as Completed. Click on Suppliers in the left navigation sidebar.
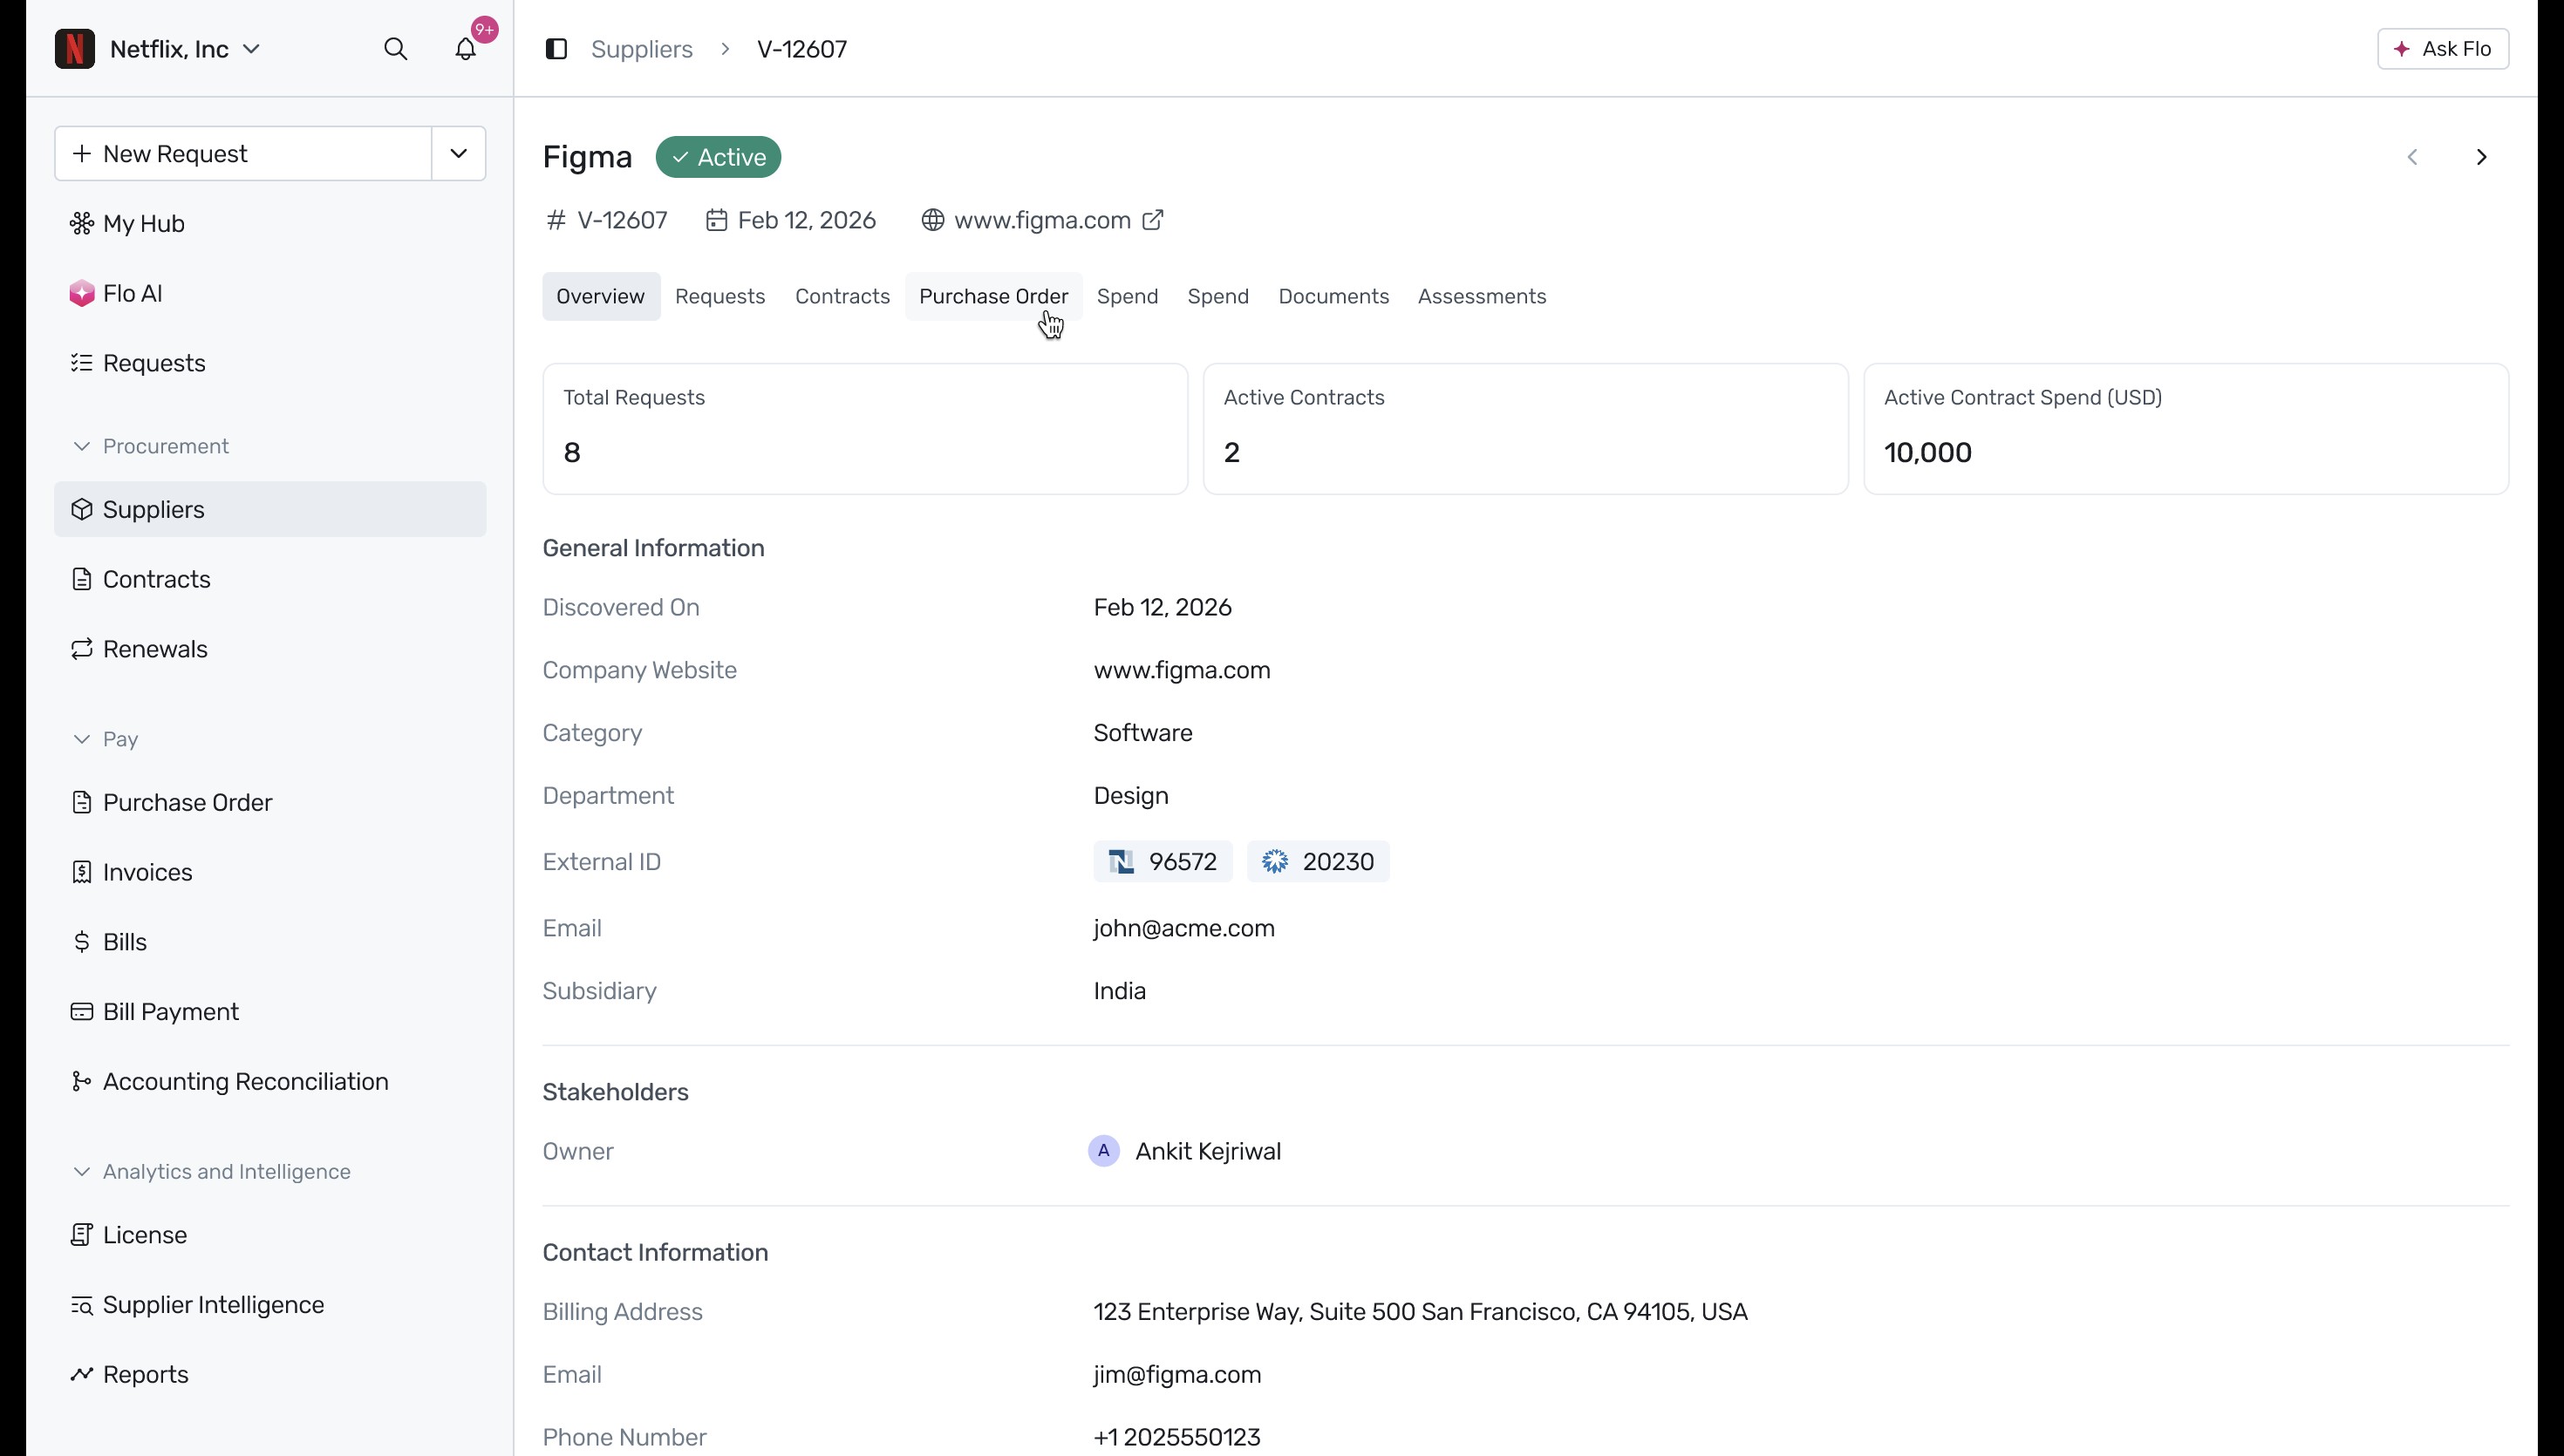
Select the newly onboarded supplier to view their comprehensive profile, including active contracts, purchase orders, spend data, and completed assessments. To learn more about managing your onboarded suppliers, see About Vendors and Vendor Management and Agreements tab - viewing active agreements.
Next Steps
Now that you have successfully onboarded your supplier, you can manage their active agreements, monitor their performance, and track upcoming renewals. To learn more about managing your vendors, see About Vendors and Vendor Management. If you need assistance with any of the integration steps, please contact your Spendflo administrator or support team.