Invoices: Extract and Map
Last updated: August 18, 2026
Spendflo's invoice management feature simplifies your accounts payable workflow by automating data extraction and bill creation. Using Flo AI, Spendflo automatically scans your invoices, matches them to the right supplier, extracts every field, and maps that data into a bill — whichever channel the invoice arrived through.
Invoice vs. bill: what’s the difference?
An invoice is the document a supplier sends you — a request for payment. Receiving one doesn’t create any obligation on its own; it’s a record that Spendflo needs to check out first.
A bill is what an invoice becomes once it’s confirmed — at that point it’s an accepted obligation to pay.
Confirming an invoice means Spendflo has matched it to an existing supplier, so there’s no ambiguity about which supplier the money is owed to. That’s the purpose of the supplier matching, confidence scoring, and duplicate checks described later in this article — they’re what an invoice has to pass before it can be confirmed.
Once an invoice is confirmed, it becomes a bill. From there it’s checked against any matching purchase order as part of approval, and — once approved — posts to your general ledger, where it starts appearing in your GL reports. That part of the process is covered in the Bills guide.
Where invoices come in
Spendflo accepts invoices from three channels:
Email — each subsidiary or business unit has its own dedicated invoice inbox (for example, invoice-uswest@yourcompany.spendflo.com). Suppliers can send invoices directly, or an employee can forward one they received.
Direct upload — upload an invoice file yourself from the Invoices page.
Cloud storage — invoices dropped into a connected folder (Google Drive, Box, Dropbox, or similar) are picked up automatically.
All three converge into the same review queue, so you don’t need to treat them differently once they land.
Prerequisites
Before you begin uploading invoices, ensure that your ERP integration is configured. Spendflo imports critical attributes such as suppliers, departments, and subsidiaries from your ERP to match and validate invoice data.
How to Upload and Confirm an Invoice
Follow these steps to upload an invoice and create a confirmed bill in Spendflo:
Navigate to the Invoices page on the Spendflo platform to view the main dashboard containing all invoices.

Click the Upload Invoice button in the top right corner to open the file upload dialog.
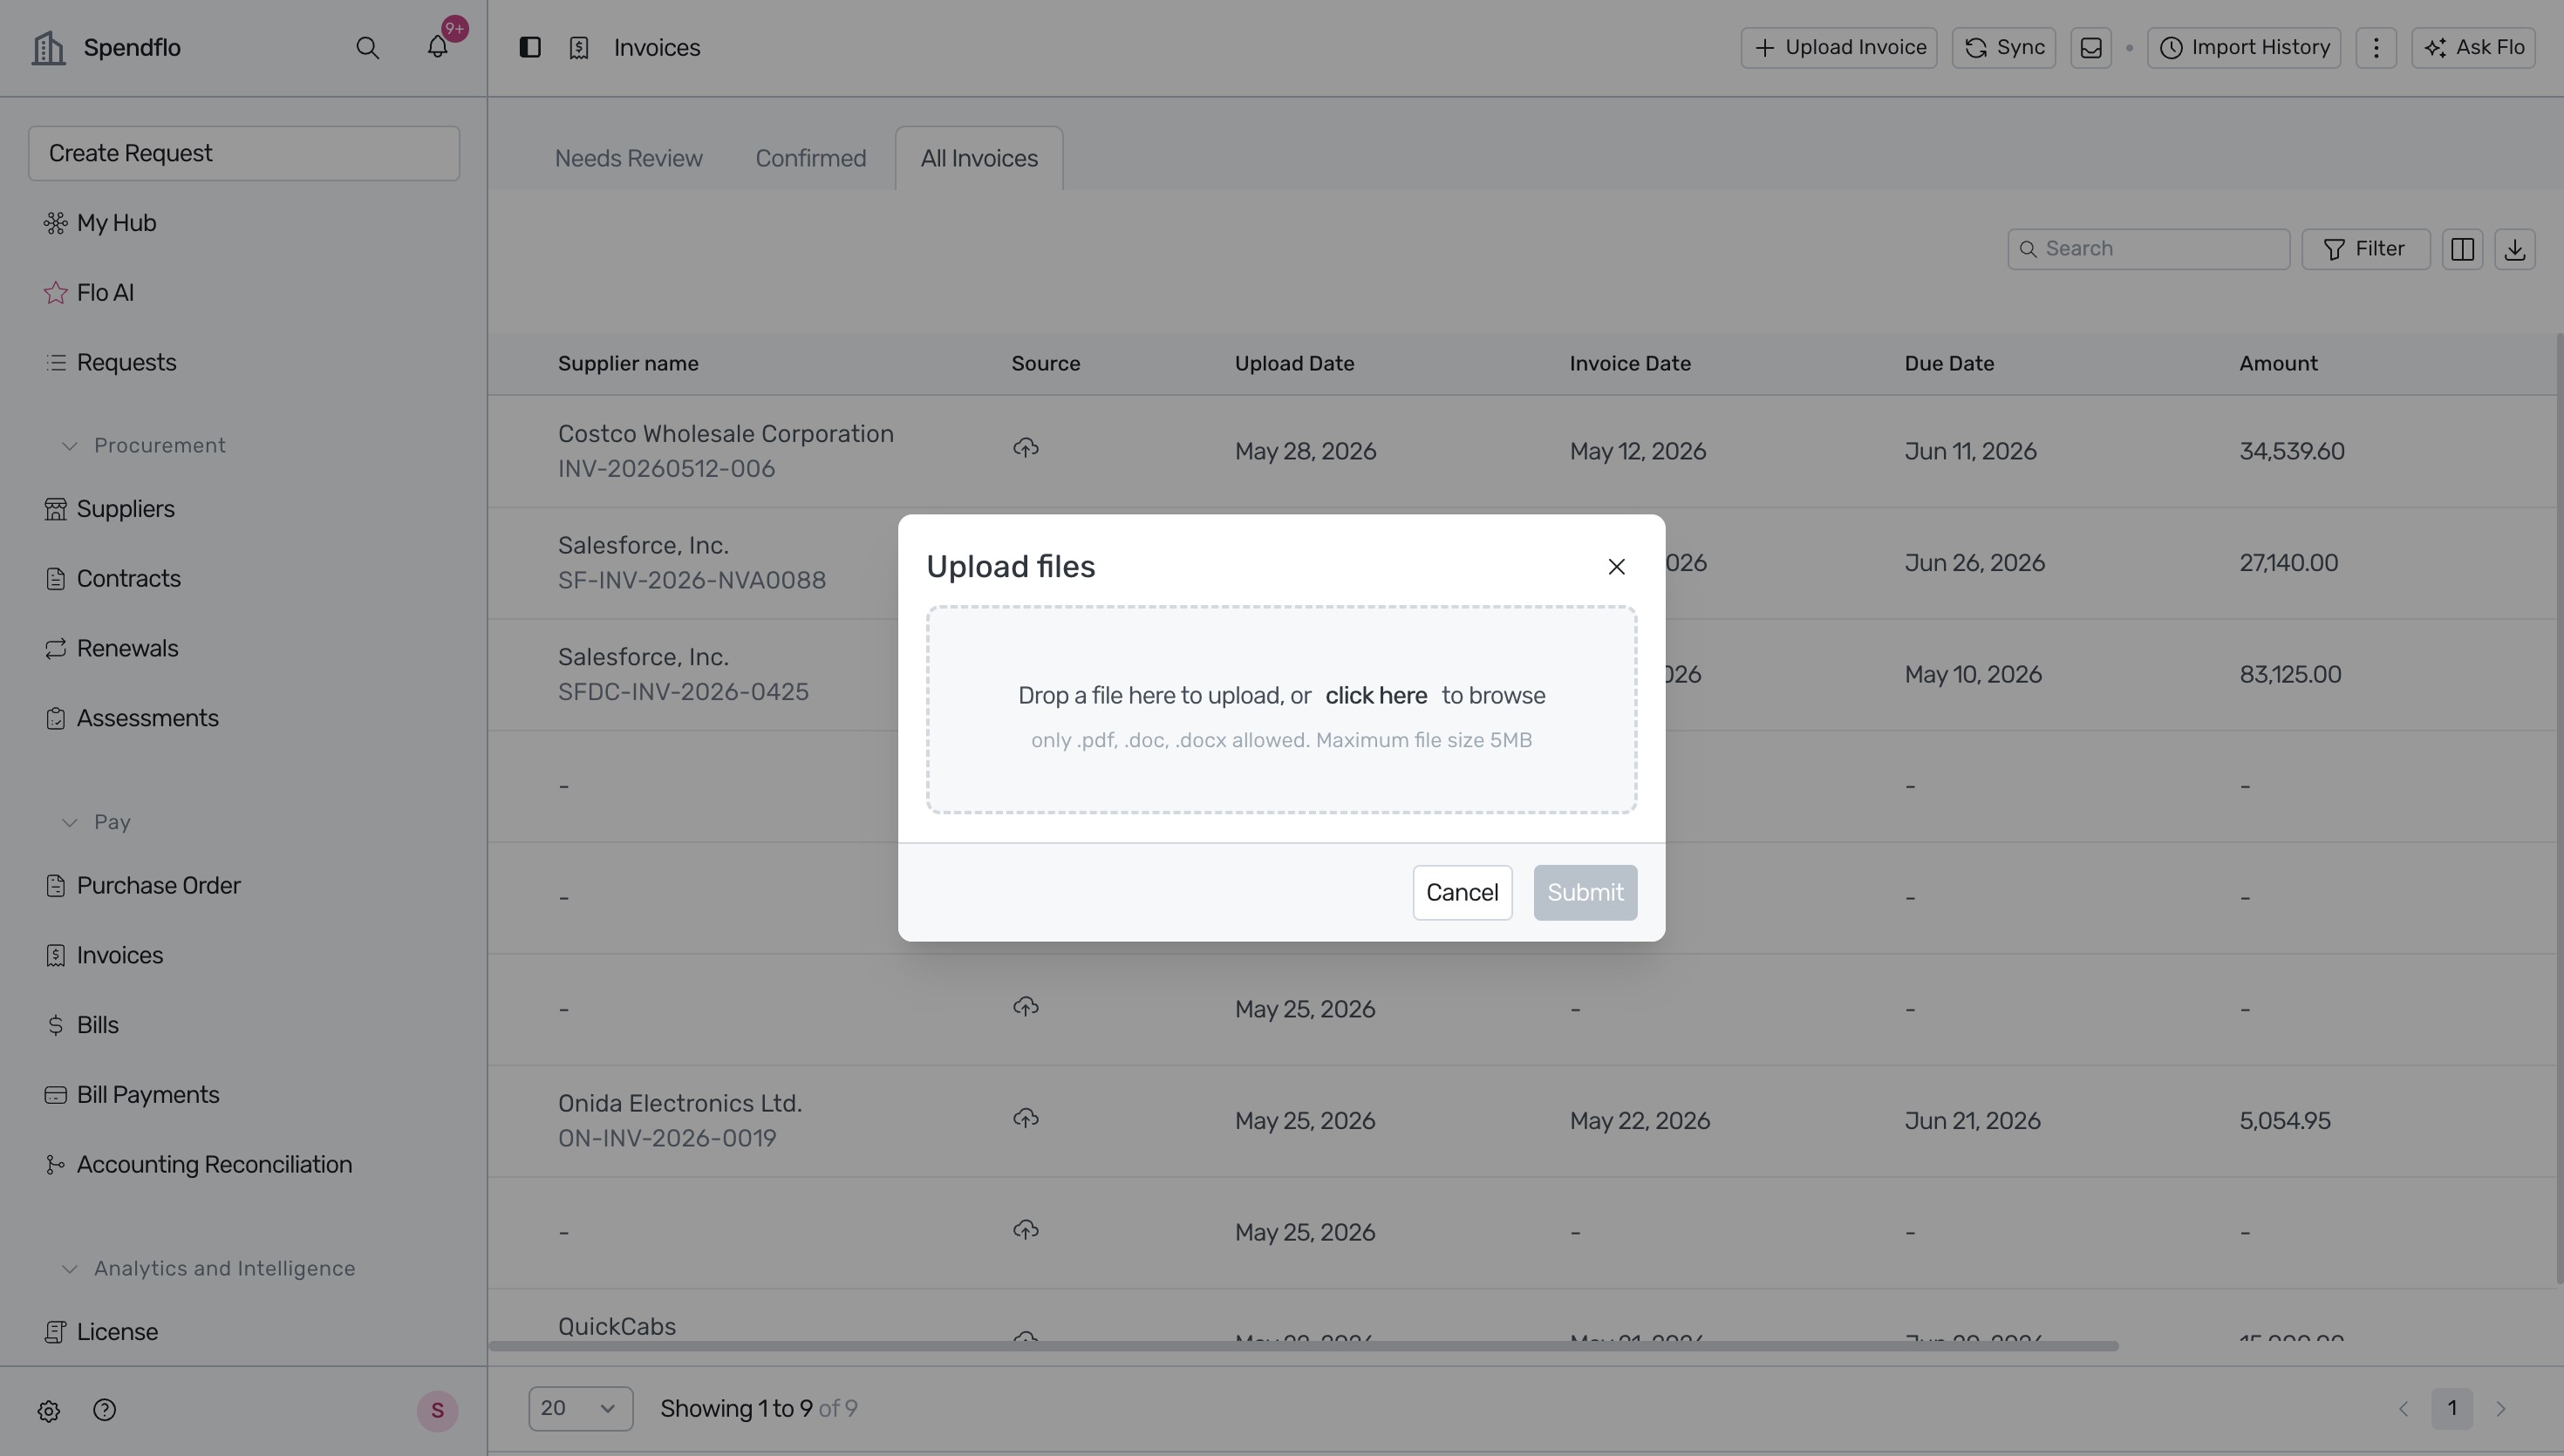
Click the 'click here' link to select an invoice file from your computer and click the Submit button.

Wait for a few moments while the AI automatically processes the invoice, matches the supplier, extracts line items, and prepopulates the bill form.

Once processed, you will be redirected to the Invoice Detail page with the status set to 'Needs Review'. Here, you can verify the extracted fields against the invoice document.
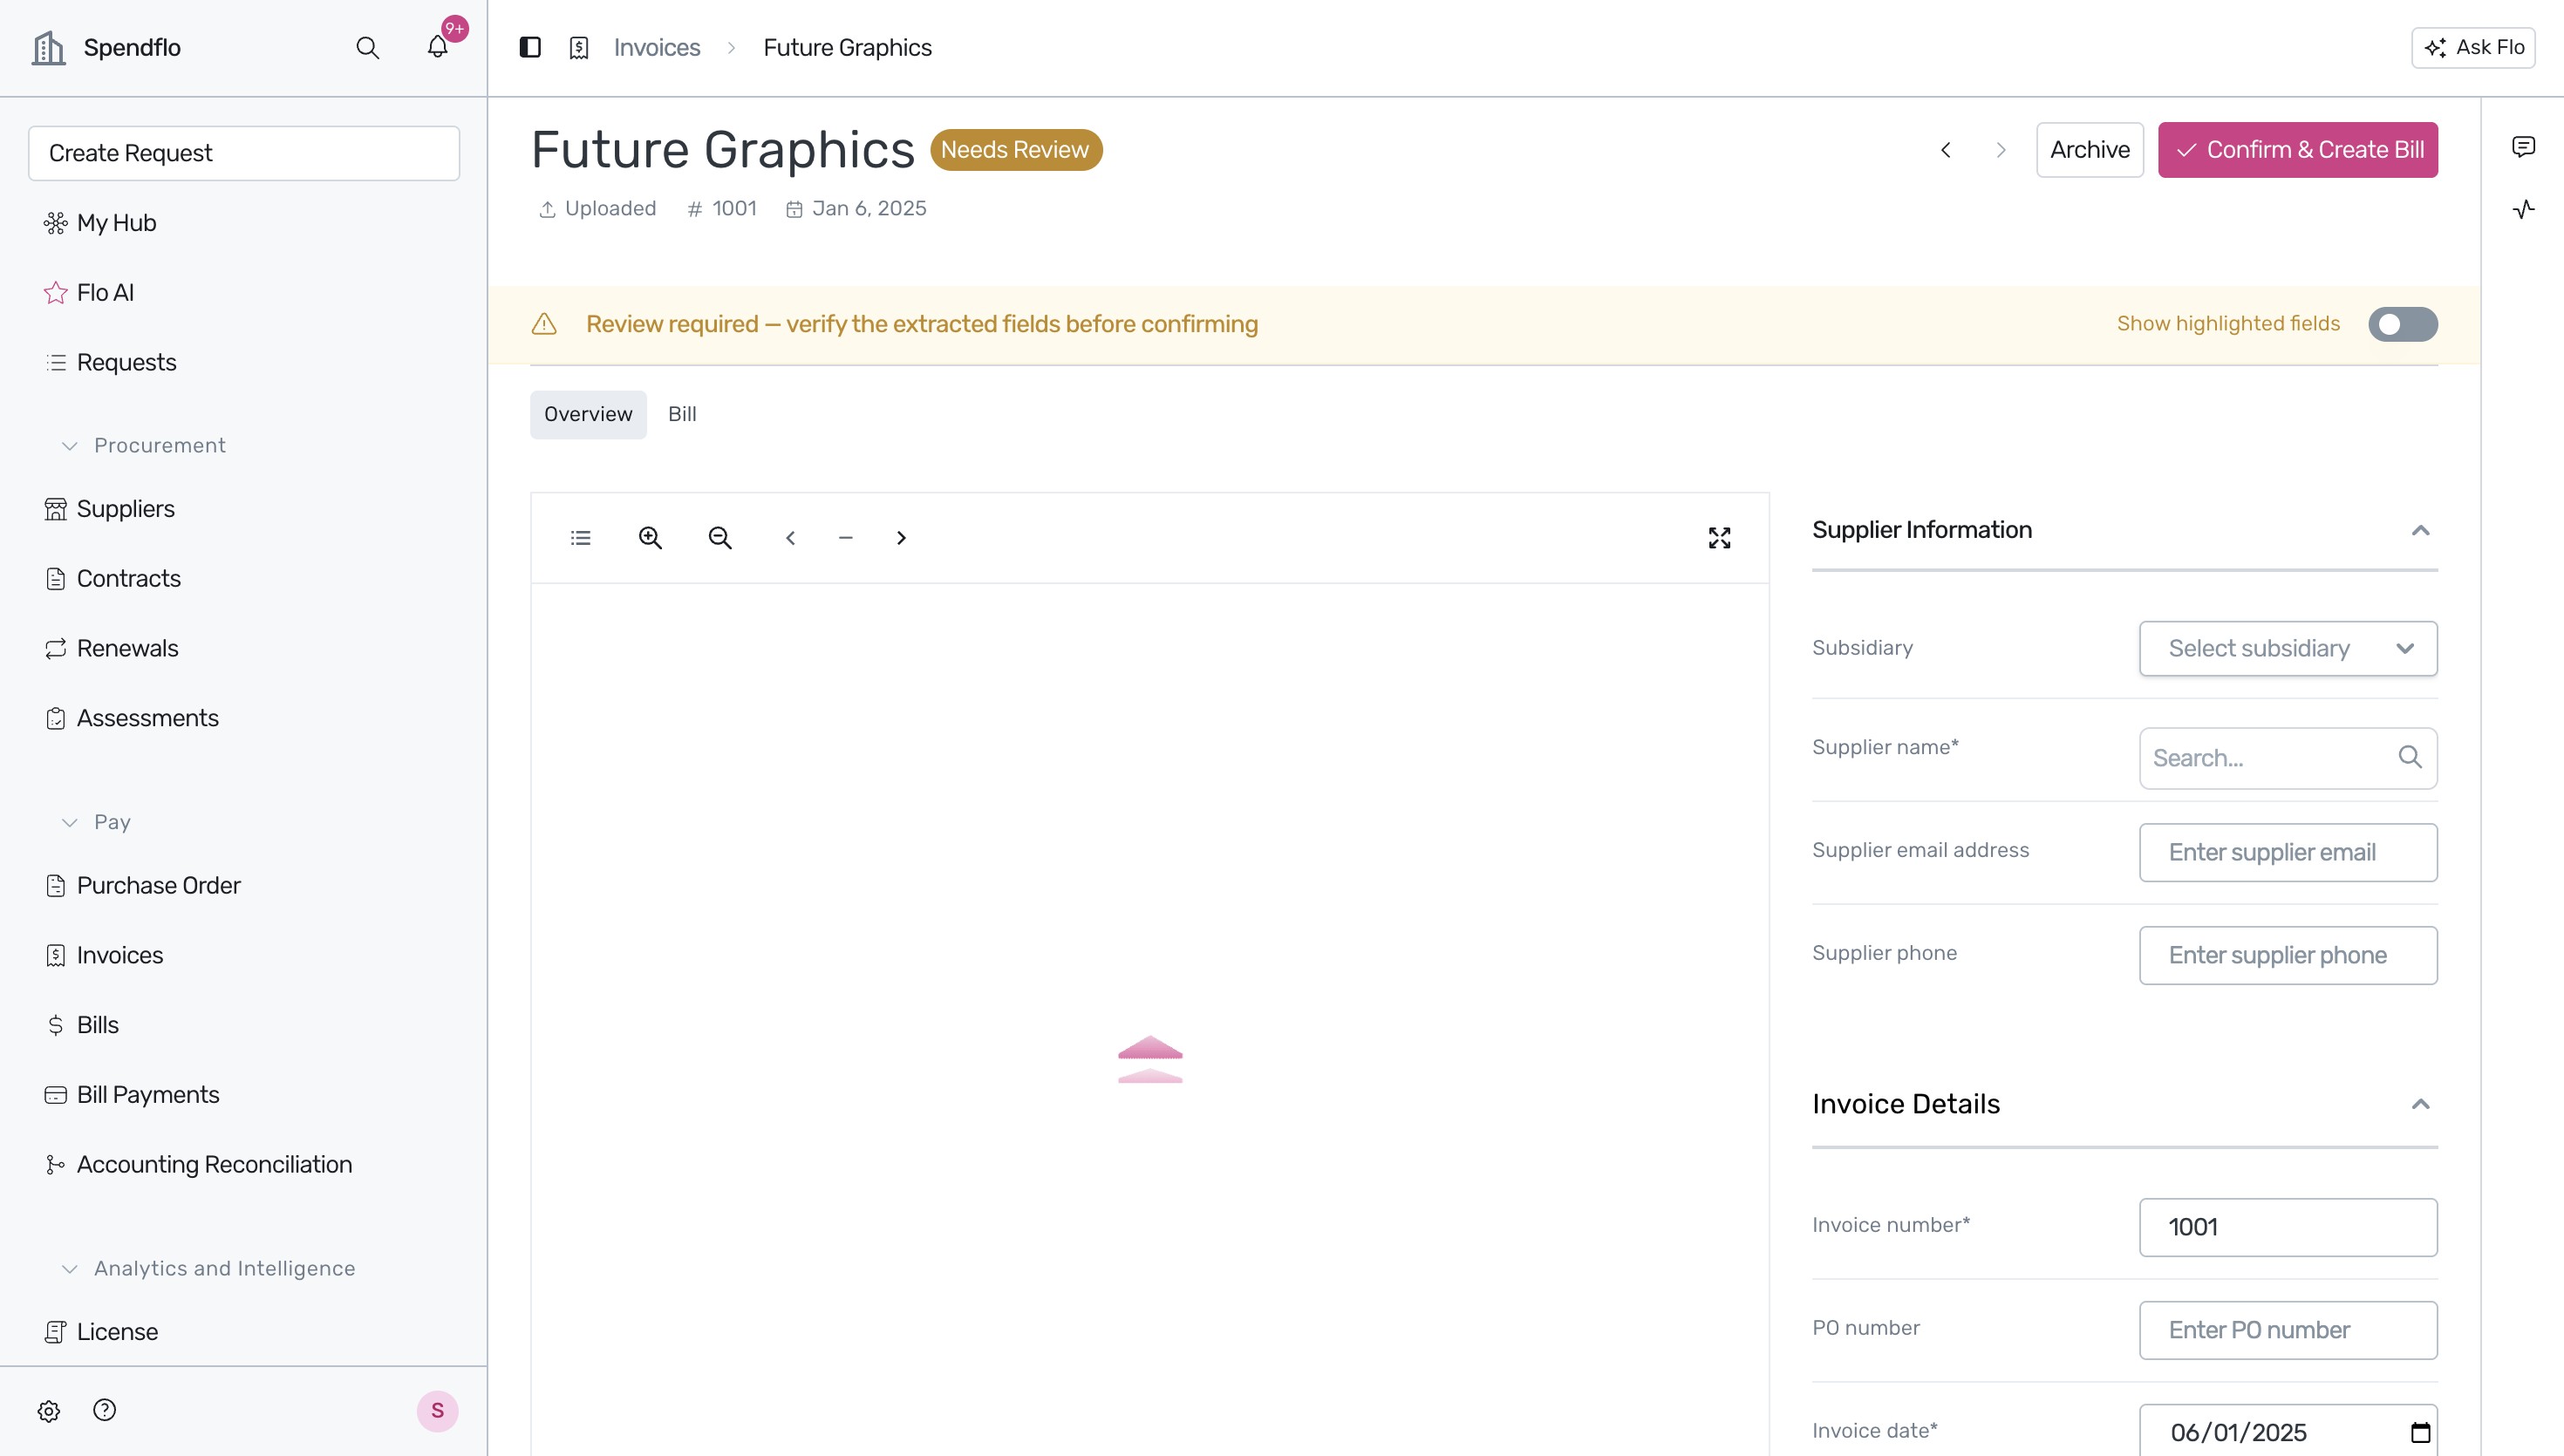
Select the appropriate subsidiary from the dropdown menu under the Supplier Information section.

Click the 'Confirm & Create Bill' button in the top-right corner to open the confirmation dialog.
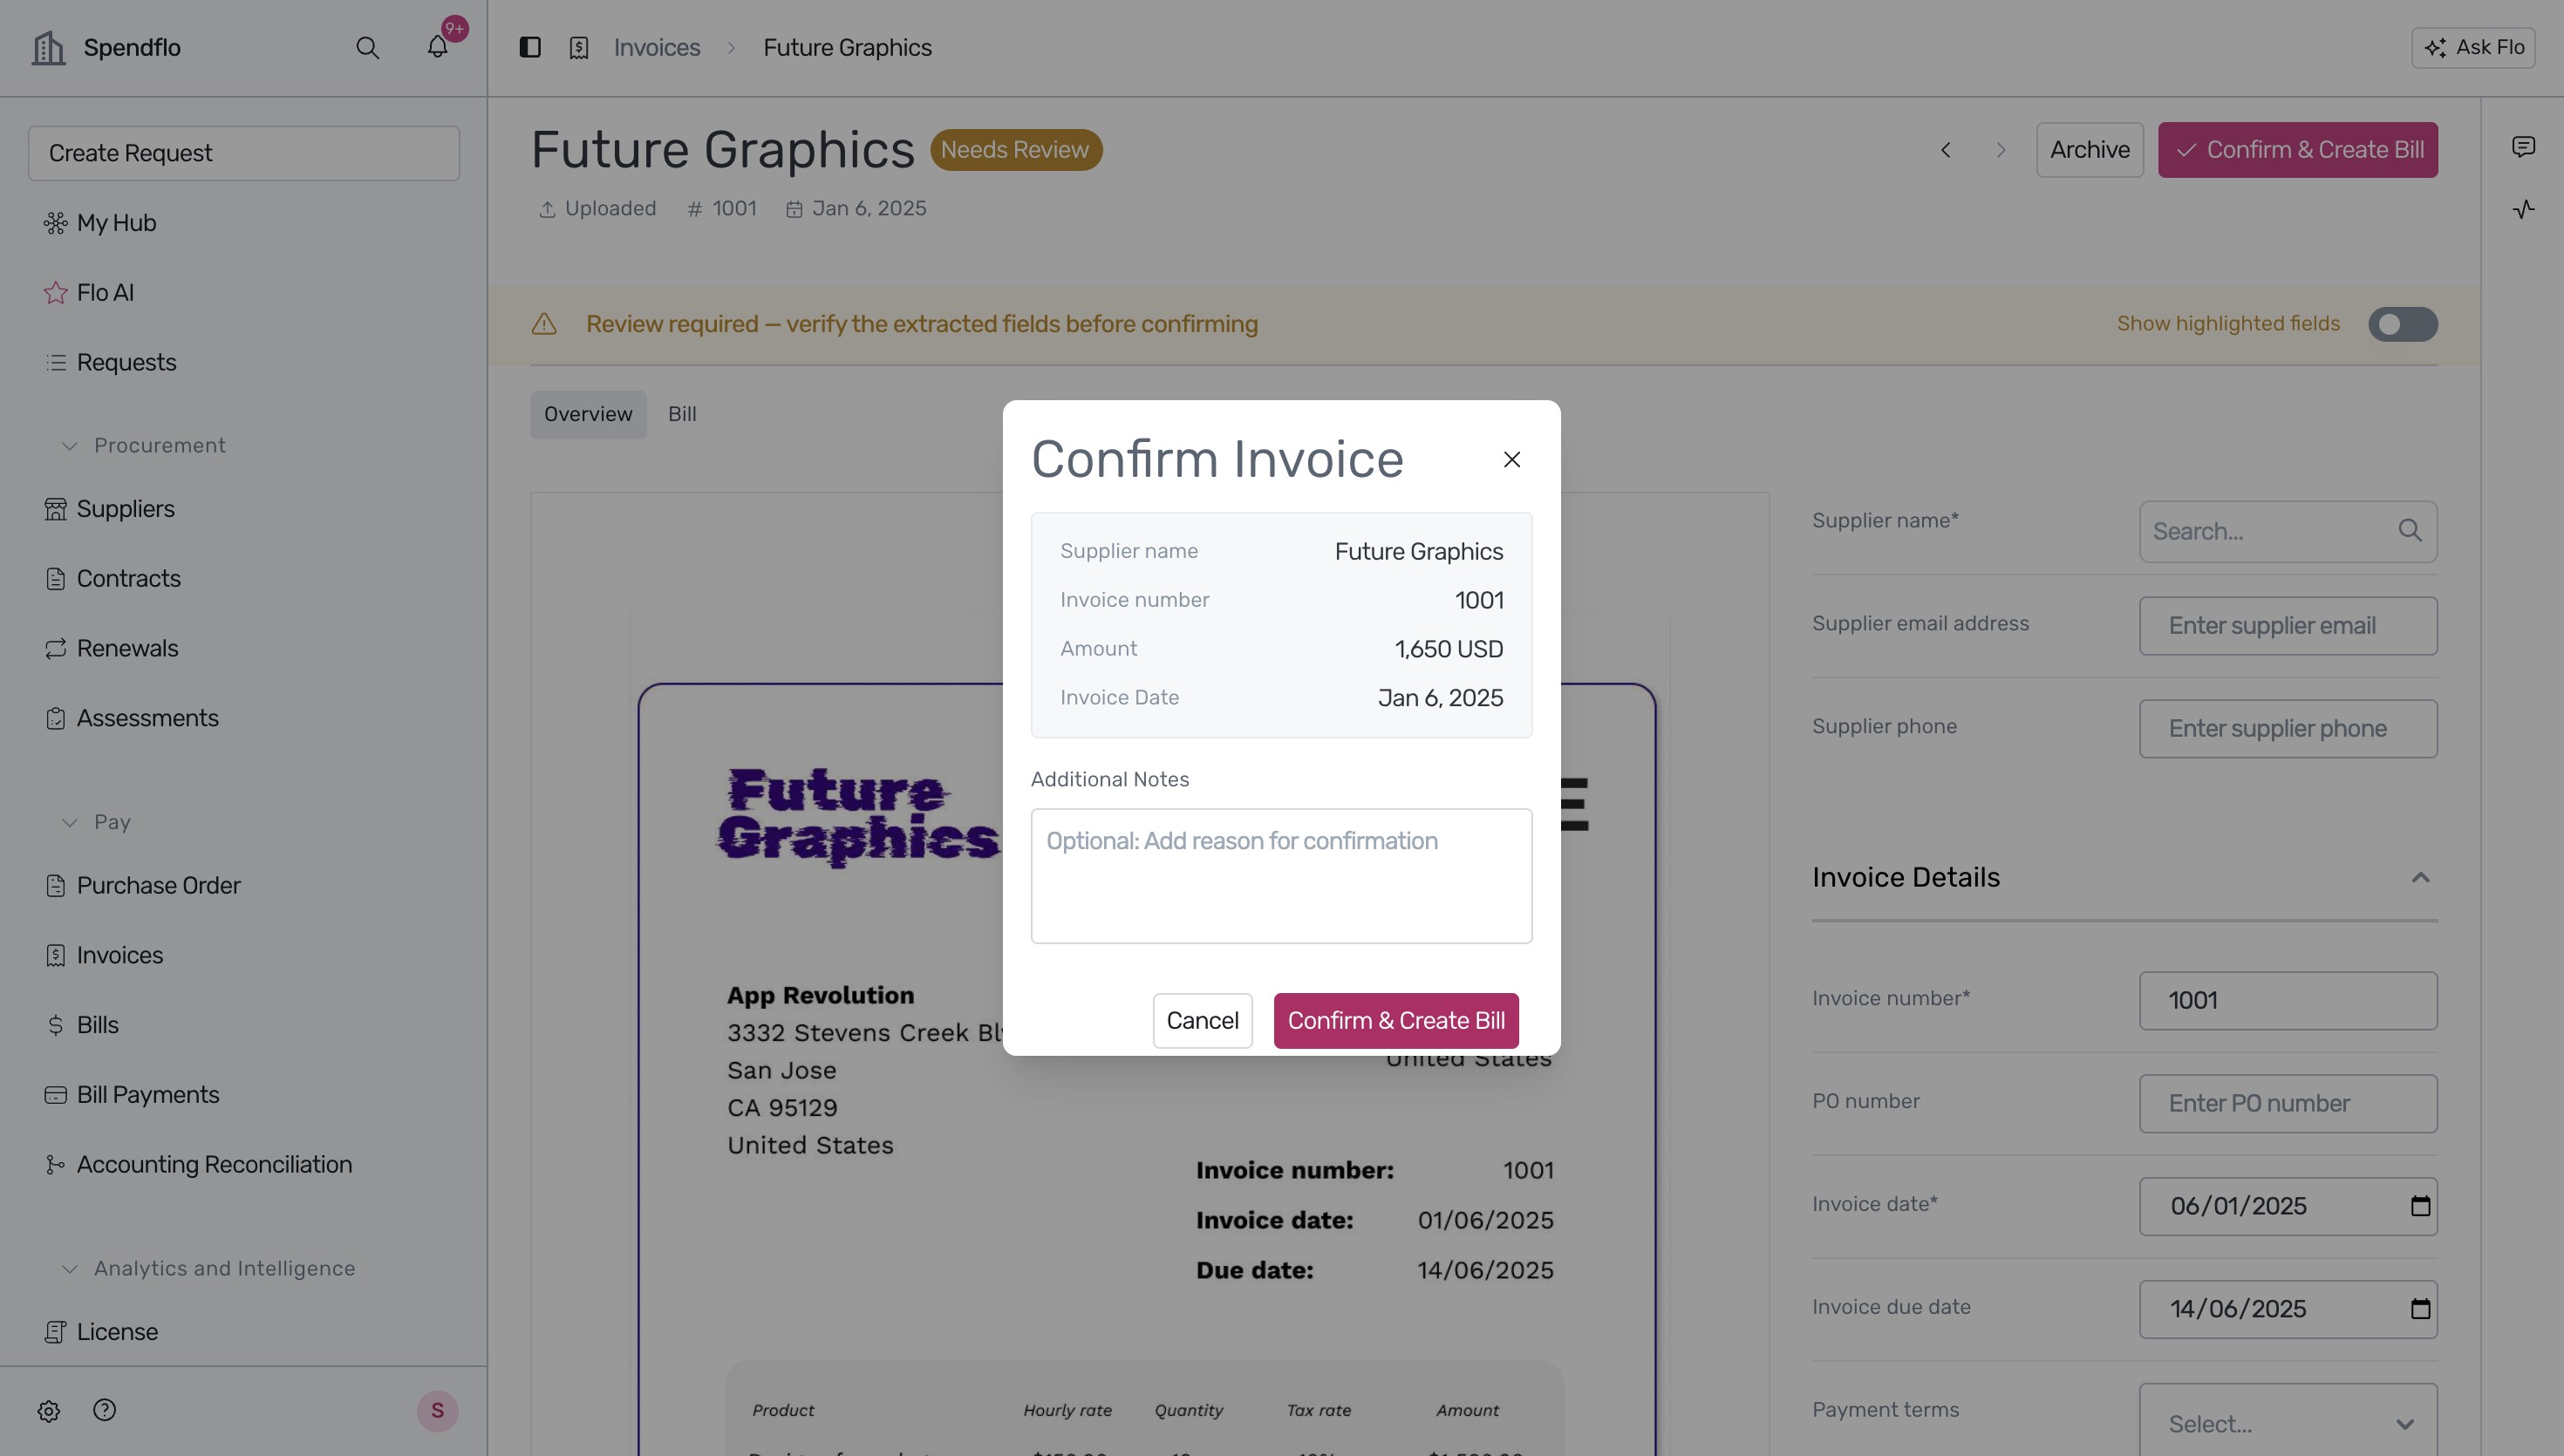
Review the invoice summary in the 'Confirm Invoice' dialog and click 'Confirm & Create Bill' to finalize. The invoice status will update to 'Confirmed'.

Extracting invoice data
Confidence scoring
As Spendflo extracts each field from an invoice — supplier name, invoice number, dates, total, and so on — it assigns a confidence score. The fields that matter most for creating a bill (supplier name, invoice number, invoice date, due date, and total amount) must each be extracted with at least 80% confidence. If even one of these falls short, the invoice is routed to Needs Review instead of being auto-confirmed, so a person can check it before it becomes a bill.
If all of them clear the threshold, the invoice is auto-confirmed — and Spendflo automatically creates the corresponding bill at that moment, with all the invoice’s information carried over (the same mapping described in Mapping an invoice to a bill below). No one needs to click Confirm & Create Bill for this to happen; it’s only needed for invoices that land in Needs Review.
Matching the invoice to a supplier
Spendflo tries to identify the supplier using several methods, in order, stopping as soon as one produces a confident match:
Exact identifiers — tax ID, bank account and routing number, or supplier portal ID
Supplier name — matched against your supplier list, accounting for legal suffix differences (e.g. “Acme Inc.” and “Acme LLC” are treated as the same supplier) and known abbreviations
Sender domain — the email domain the invoice arrived from, checked against known supplier domains (billing platforms like Bill.com or QuickBooks, and generic providers like Gmail, are excluded from this check)
Learned matches — supplier associations Spendflo has learned from your team’s past corrections
If none of these produce a confident match, Spendflo falls back to AI reasoning over the invoice details and your correction history. If it still can’t find a single confident match, the invoice is routed to Needs Review so you can assign the supplier yourself.
Catching duplicate invoices
Spendflo checks every new invoice against what’s already in the system:
Confirmed duplicate — the invoice number, amount, date, and file all match an existing invoice (or the invoice number and file match exactly on their own). This is automatically Rejected, with the reason recorded as Duplicate.
Potential duplicate — most details match but one field differs — for example, the same supplier and amount but a different invoice number. This is routed to Needs Review with a flag showing which field doesn’t match, so you can confirm whether it’s really a duplicate.
Audit Trail
Every invoice keeps a complete history of what happened to it and why. Open the Audit Trail tab on an invoice to see:
When the invoice was received, and through which channel
What was extracted, including any fields that were inferred rather than read directly from the document
The supplier matching result — which method found the match, and how confident it was
The outcome of the duplicate check
The final routing decision (Confirmed, Needs Review, or Rejected) and the reason behind it
Every time someone reviewed, corrected, or actioned the invoice, with a timestamp and their name
Use the audit trail whenever you need to explain a decision — for example, why an invoice was sent to Needs Review, or who corrected a supplier match.
Mapping an invoice to a bill
When you click Confirm & Create Bill, Spendflo creates a new bill and carries the invoice's information over automatically — you don't need to re-enter anything.
Mapped to the bill header: Supplier, Subsidiary, Invoice Number, PO Number (if present), Invoice Date, Due Date, Payment Terms, Currency, Total Amount, and any bank or payment details captured from the invoice.
Mapped to each bill line item: description, quantity, unit price, amount, discount, and tax details (tax name, rate, and amount, where present).
The invoice stays linked to the bill it created, so you can always trace a bill back to its source invoice.
Note: if a bill already exists for this invoice and is still in progress (Draft, Pending Approval, or Approved), Spendflo won't create a second one — the Create Bill option stays hidden until that bill reaches a final state (Voided, Cancelled, or Rejected).
Finding invoices in the list
Use the search bar to find an invoice by supplier name or invoice number — partial matches work, so searching “Acme” returns every invoice from any supplier whose name contains it.
You can also filter the list by any of these columns:
Suppliers
Invoice Number
Invoice Date
Due Date
Currency
Amount (minimum, maximum, or both)
Upload Date — when the invoice reached Spendflo
Source — the channel it came in through (email, direct upload, or cloud storage)
Filters combine — for example, you can filter to invoices from a specific supplier, above a certain amount, within a date range, all at once.
The list is also organized by status — Confirmed, Needs Review, and Rejected — so you can jump straight to the invoices that need your attention.
Next Steps
Once your invoice is confirmed, a corresponding bill is created in Spendflo. To learn more about managing your agreements and contracts, see our guide on Adding a new agreement. You can also configure your organization profile to ensure all billing entity and contact details are up to date.