Bill Approvals: Reviewing and Approving a Bill
Last updated: August 18, 2026
Managing and approving bills is a critical step in maintaining financial control and ensuring accurate SaaS spend tracking. Spendflo allows finance and procurement teams to seamlessly review, verify, and approve bills — with every status, GL coding decision, and change tracked in a full audit trail. This article covers the full bill lifecycle: reviewing and approving a bill, rejecting or voiding one, how spend owners and GL coding are assigned, and how to find bills in the list.
How to Review and Approve a Bill
Follow these steps to review a pending bill, verify its purchase order match, and approve it:
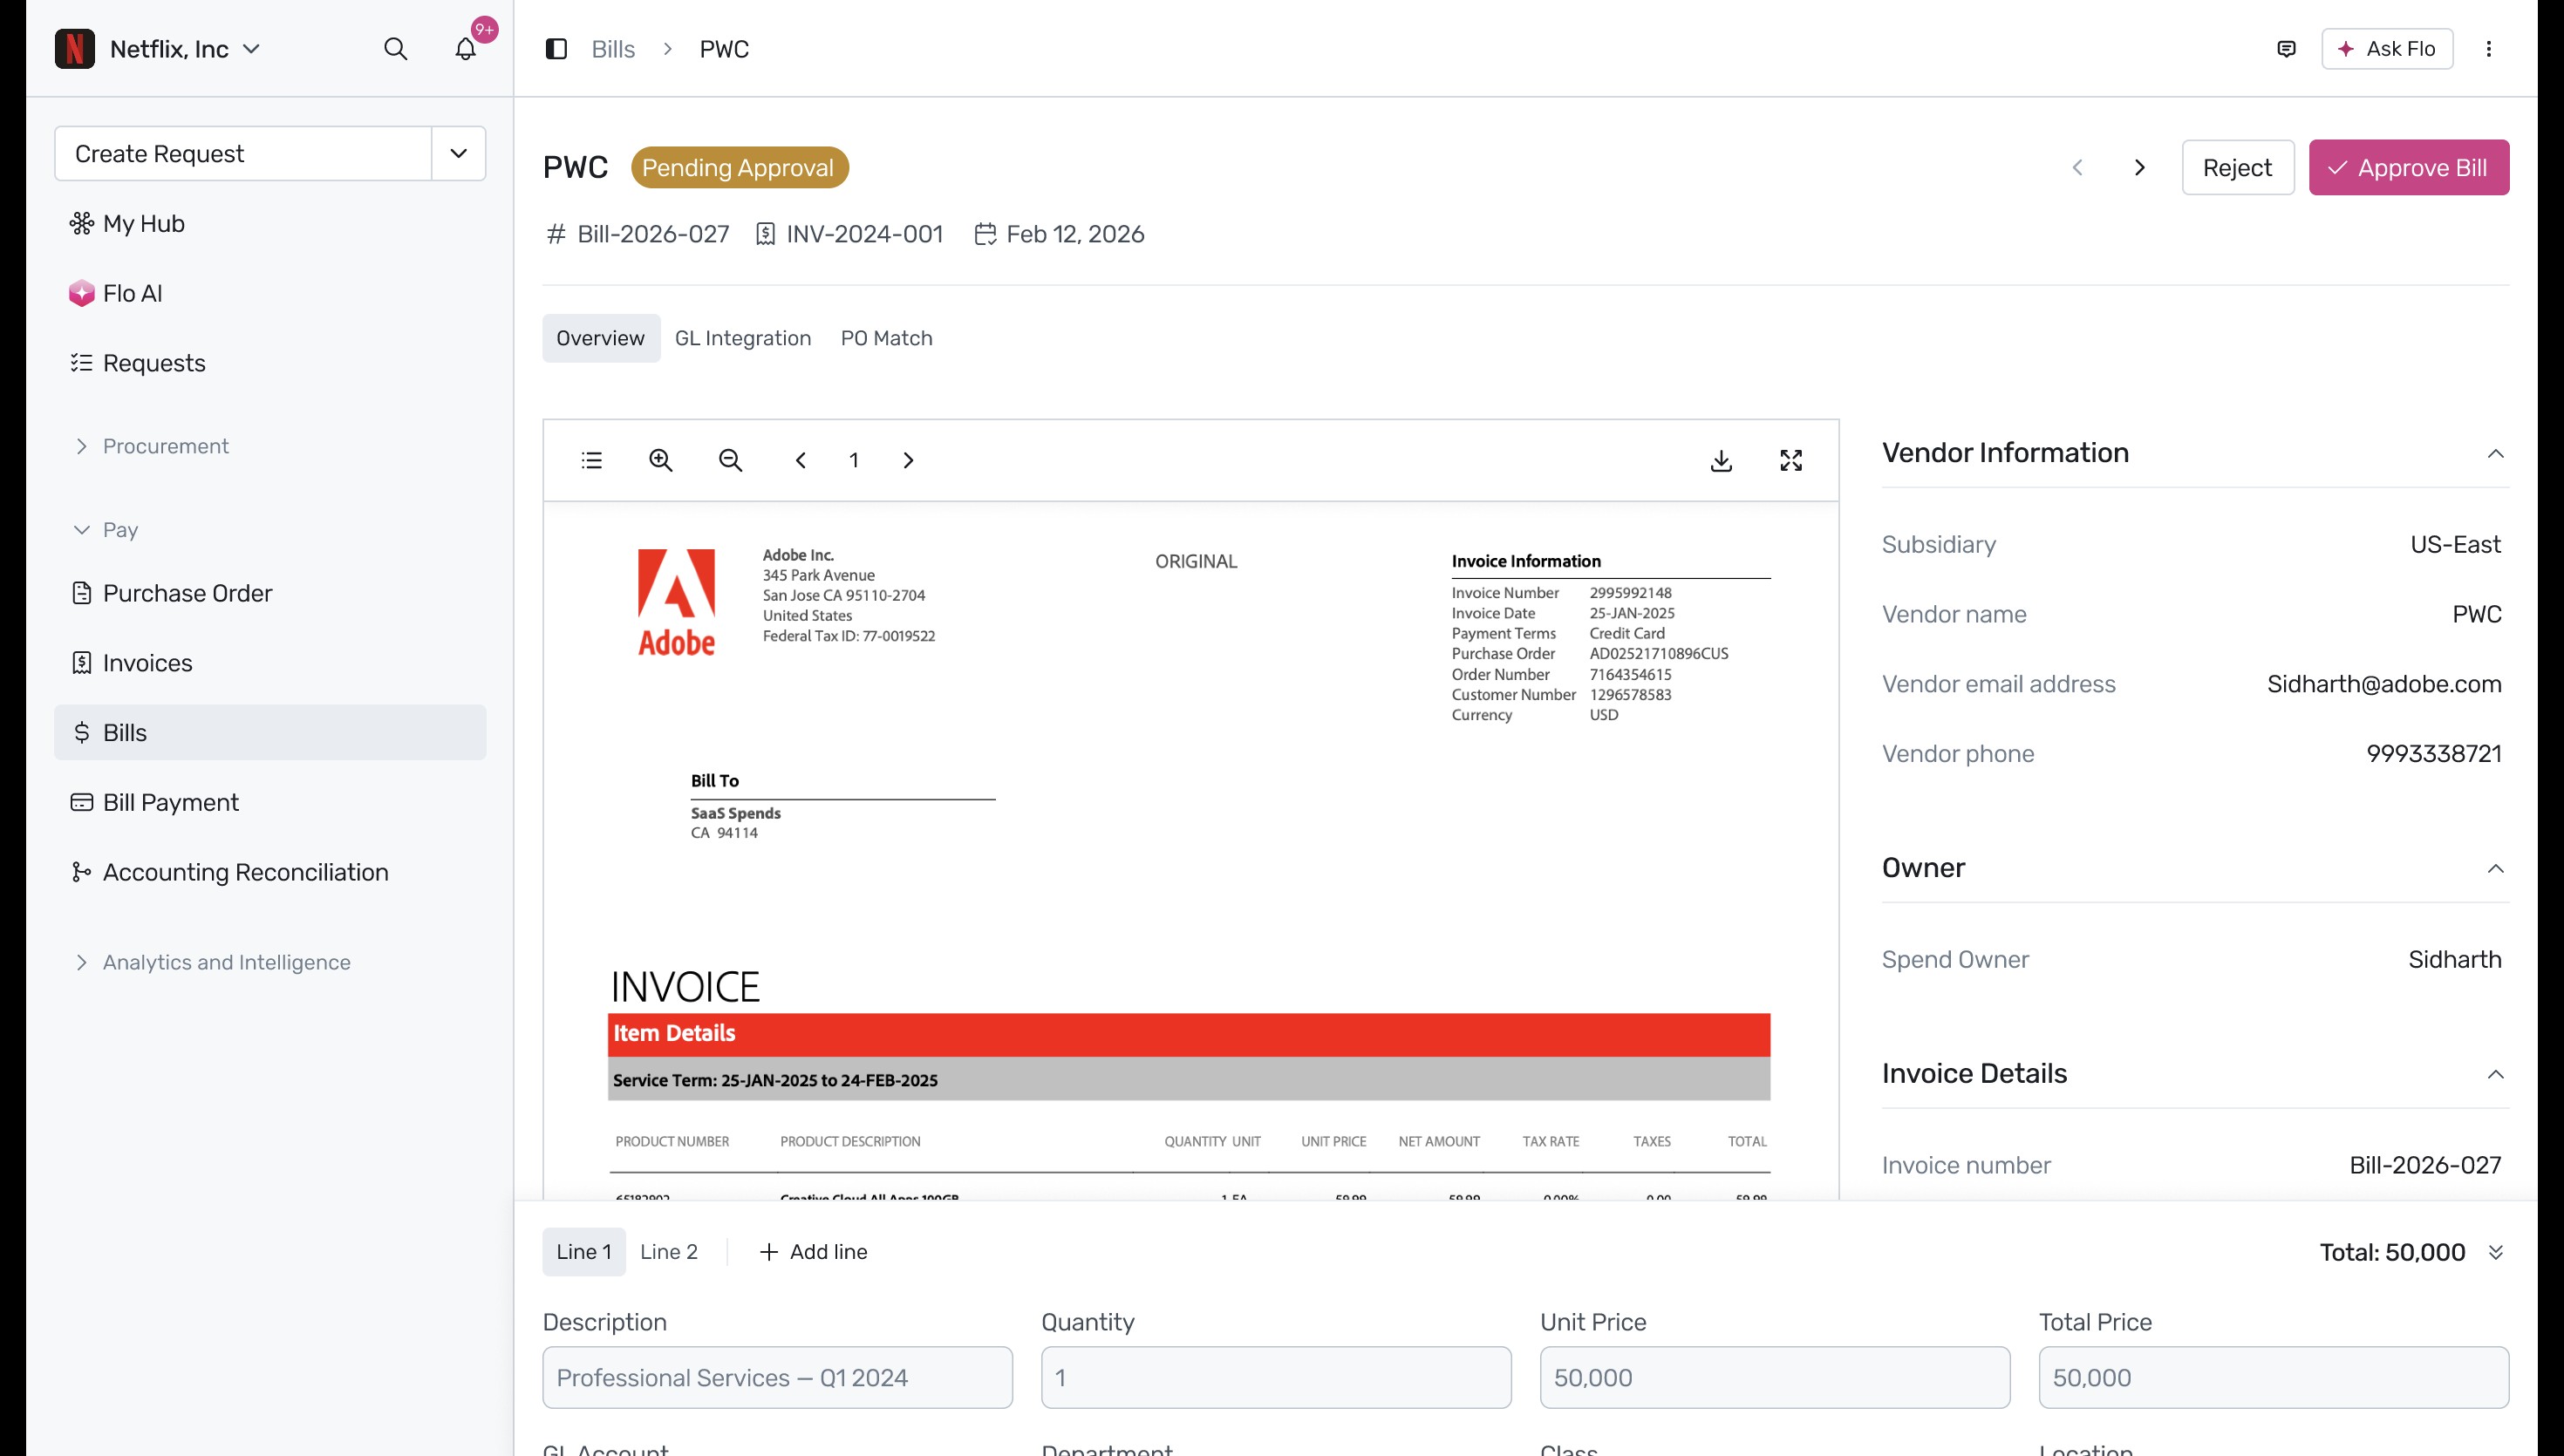
Review the bill overview: Navigate to the Bills section in the left navigation menu and select the bill that is currently pending approval. On the bill details page, review the uploaded invoice document, supplier information, spend owner details, and individual line items.
Verify the Purchase Order (PO) match: Click the PO Match tab to verify that the bill corresponds to an active purchase order. This tab displays the matched PO details, including the total PO amount, the amount already billed, the current invoice amount, and the remaining balance to ensure everything aligns correctly.

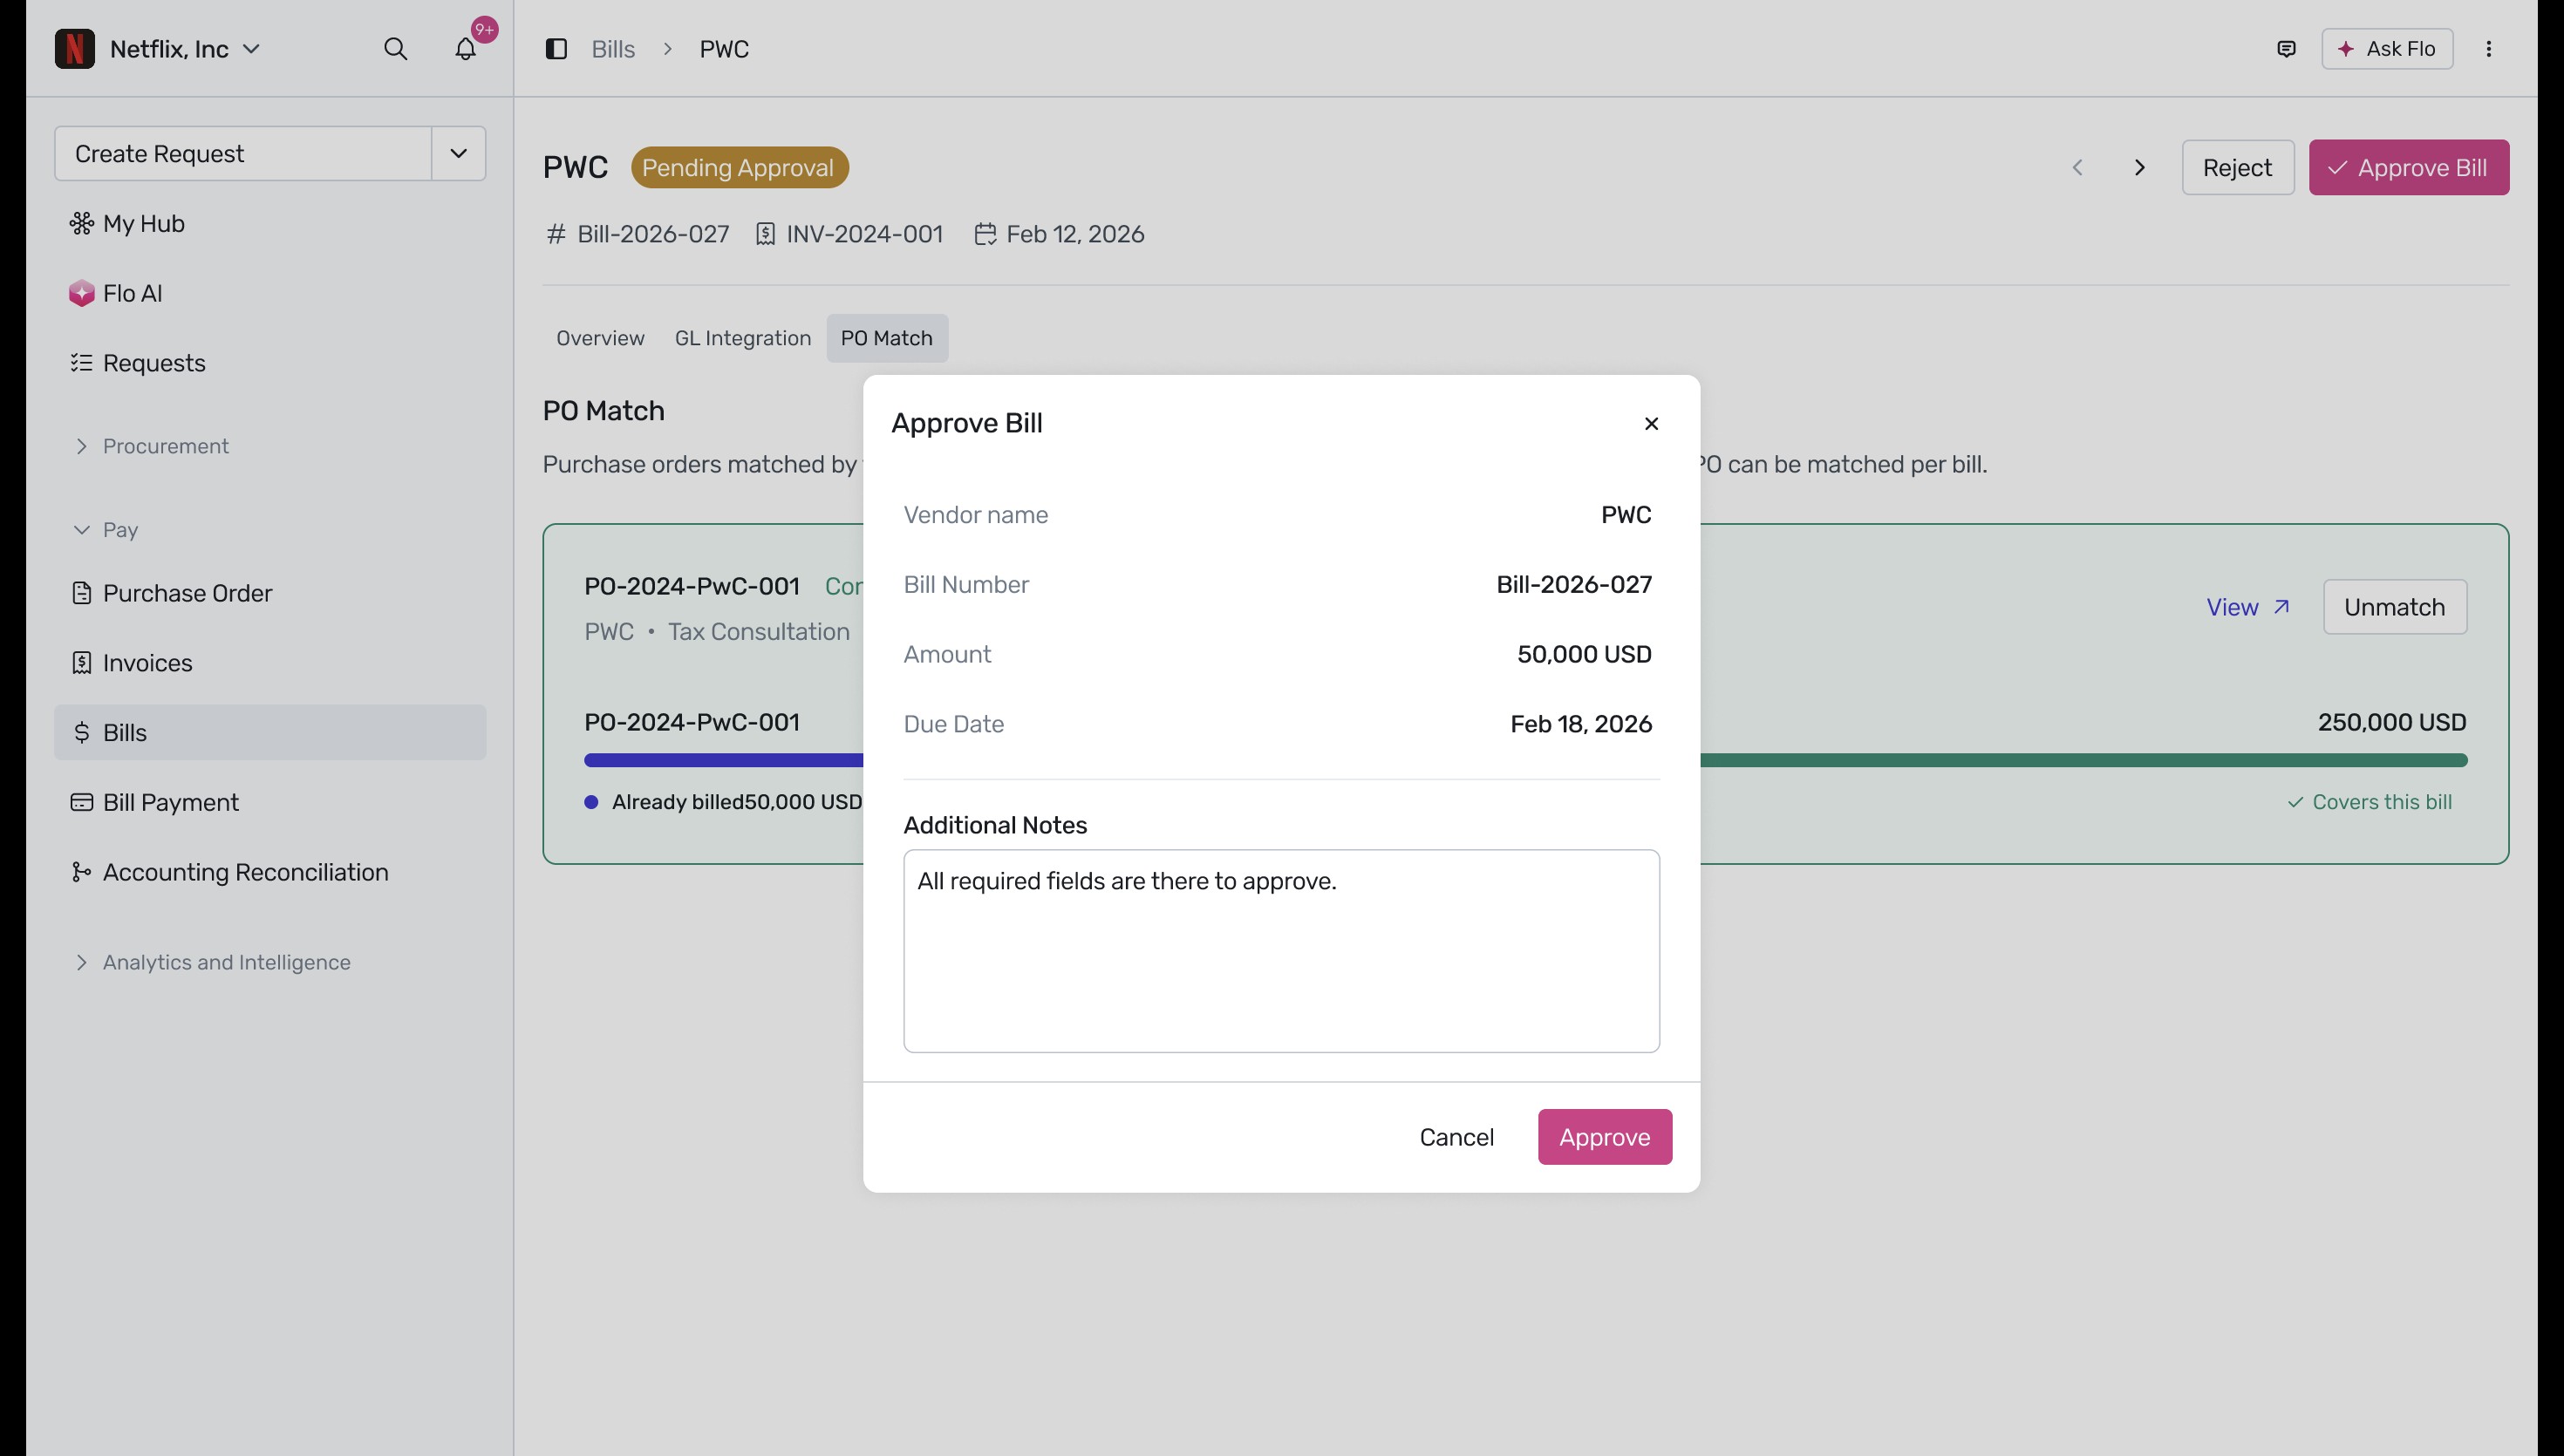
Approve the bill: Click the Approve Bill button in the top-right corner of the page. In the Approve Bill confirmation modal, review the supplier name, bill number, amount, and due date. Enter any additional notes for reference, and then click Approve.
Verify the approved status: After confirming, the bill status updates to Approved, and a green confirmation banner displaying your approval notes appears at the top of the page. Spendflo automatically creates a Bill Payment record to track how this bill gets settled — see our guide on Bill Payments for marking it as paid.

Bill statuses
New — the bill has been created but not yet submitted for approval. Fully editable.
Pending Approval — submitted, and awaiting one or more approvers. GL coding and other financial fields are still editable by Finance Executives and Admins at this stage.
Approved — every required approver has signed off. All financial fields are now locked, and a Bill Payment record is created automatically.
Rejected — an approver has rejected the bill. This is final — see below.
Archived — manually archived, usually because the bill is no longer needed. This can’t be undone.
Void — an approved bill that’s been reversed. See below.
Rejecting a bill
When an approver rejects a bill, they’re required to enter a reason. Rejected is a final status — there’s no way to edit and resubmit the same bill. If the spend is still valid, create a new bill instead.
Voiding an approved bill
Voiding reverses an approved bill — it’s an accounting action, not a delete. Only Approved bills can be voided, and only if none of its bill payments have been made yet (or all of them have themselves been voided — see our Bill Payments guide).
To void a bill:
Open the approved bill and select Void.
Enter a void reason (required).
The bill moves to Void — a final status, and its financial fields become read-only.
Voiding a bill also voids it in NetSuite: Spendflo automatically creates a reversing entry there so your GL stays in sync — you don’t need to do anything on the NetSuite side.
Spend owner
The spend owner is the person accountable for a bill’s expense. Spendflo assigns it automatically wherever possible — from the supplier’s saved owner, from a matched purchase order’s requestor, or from a pattern Spendflo has learned from past bills with this supplier. If none of these apply, the field is left blank until someone sets it manually.
The spend owner’s department matters beyond the bill itself: where approval routing is configured to route by department, the head of the spend owner’s department is who gets assigned as the approver.
GL coding
Each line item on a bill needs a GL account (and, depending on your NetSuite setup, department, class, and location). Spendflo suggests all of these automatically:
If the bill is matched to a purchase order, the GL account and dimensions are copied straight from the matching PO line item.
Otherwise, Spendflo looks at how this supplier and spend owner have been coded on past bills, and reuses that pattern.
If there’s no pattern to go on yet, Spendflo uses AI to suggest a value based on your chart of accounts and how similar bills have been coded before.
Spendflo can also split a line item automatically if that’s the pattern it’s learned for this supplier. For example, if a supplier’s cost has previously been divided across two departments — say, Engineering and Design — new bills from that supplier are automatically split into matching line items, coded to each department in the same proportion as before. You don’t need to set this up; Spendflo picks it up from past bills.
Every suggested value — including any automatic split — is pre-filled but fully editable, so you can review and correct it before submitting the bill.
Audit trail
Every bill keeps a complete history, visible to Finance Executives and Admins:
When and how it was created (manually or from an invoice)
Every field edit, with the old and new value
Every approval step — who approved it and when
The rejection reason, if rejected
The void reason, if voided
Every sync to NetSuite, and any sync failures
Finding bills in the list
Search by bill number or supplier name — partial matches work. You can also filter by any of these columns:
Supplier
Source
Invoice Date
Due Date
Invoice Number
Amount
Currency
Filters combine — for example, you can narrow to bills from a specific supplier, above a certain amount, within a date range, all at once.