Adding a Flo Agent step to a workflow
Last updated: July 29, 2026
Overview
Workflow builders can add a published agent as a step in any workflow, so it runs automatically as part of your procurement process. This article covers adding the step; for what a request viewer sees once it runs, see Viewing and acting on an AI Agent task on a request.
Step 1. Add a Flo Agent step
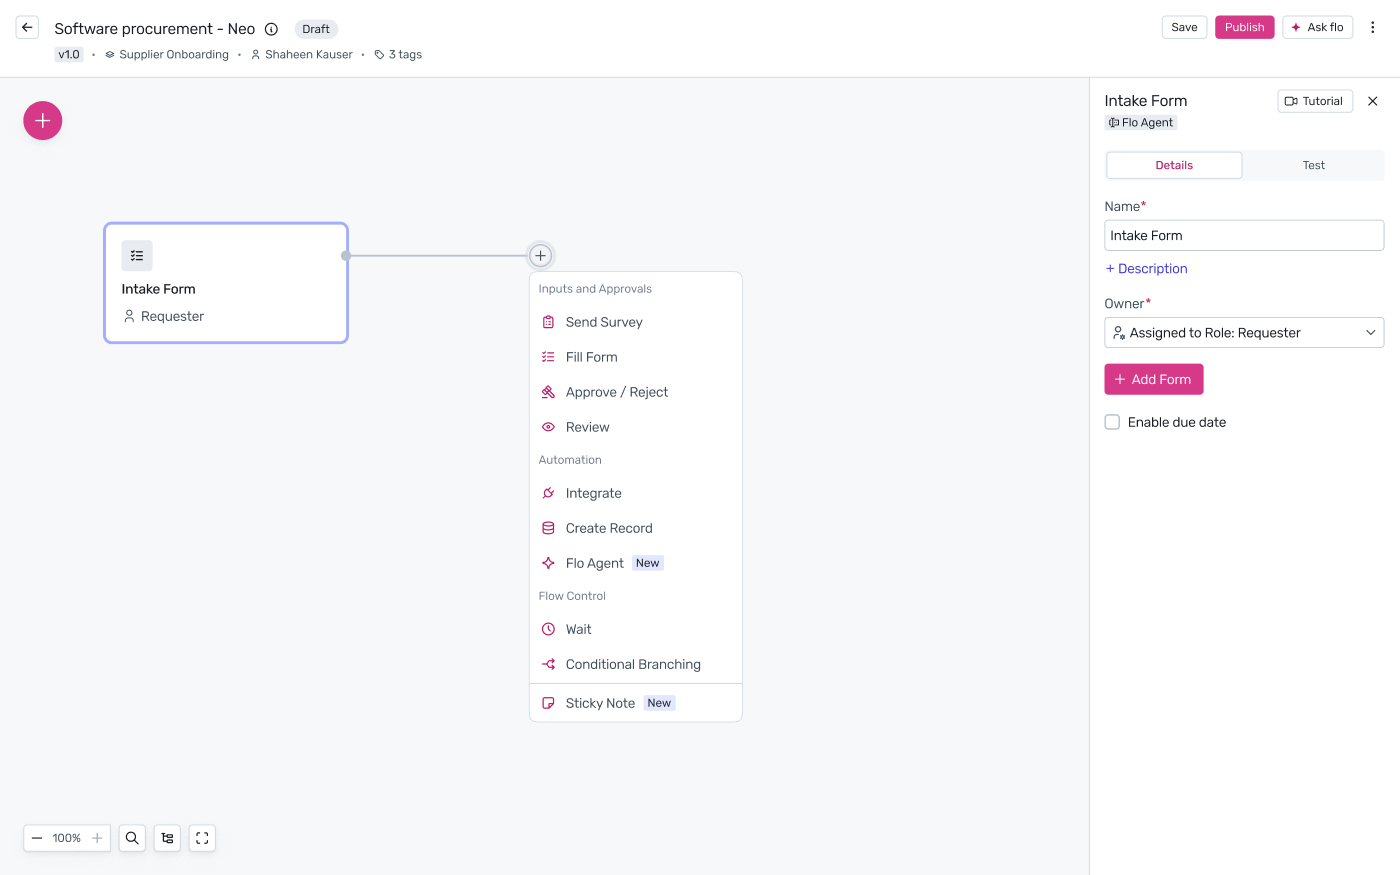
In the workflow builder, click + to add a new step and choose Flo Agent from the step type menu (under Automation).
Step 2. Select the agent
Give the step a name, then choose which published agent it runs under Select Agent. Click Preview next to the field to see that agent's instructions, Domain, and Variables read-only, without leaving the workflow builder — use Go to Agents from there if you need to edit the agent itself.

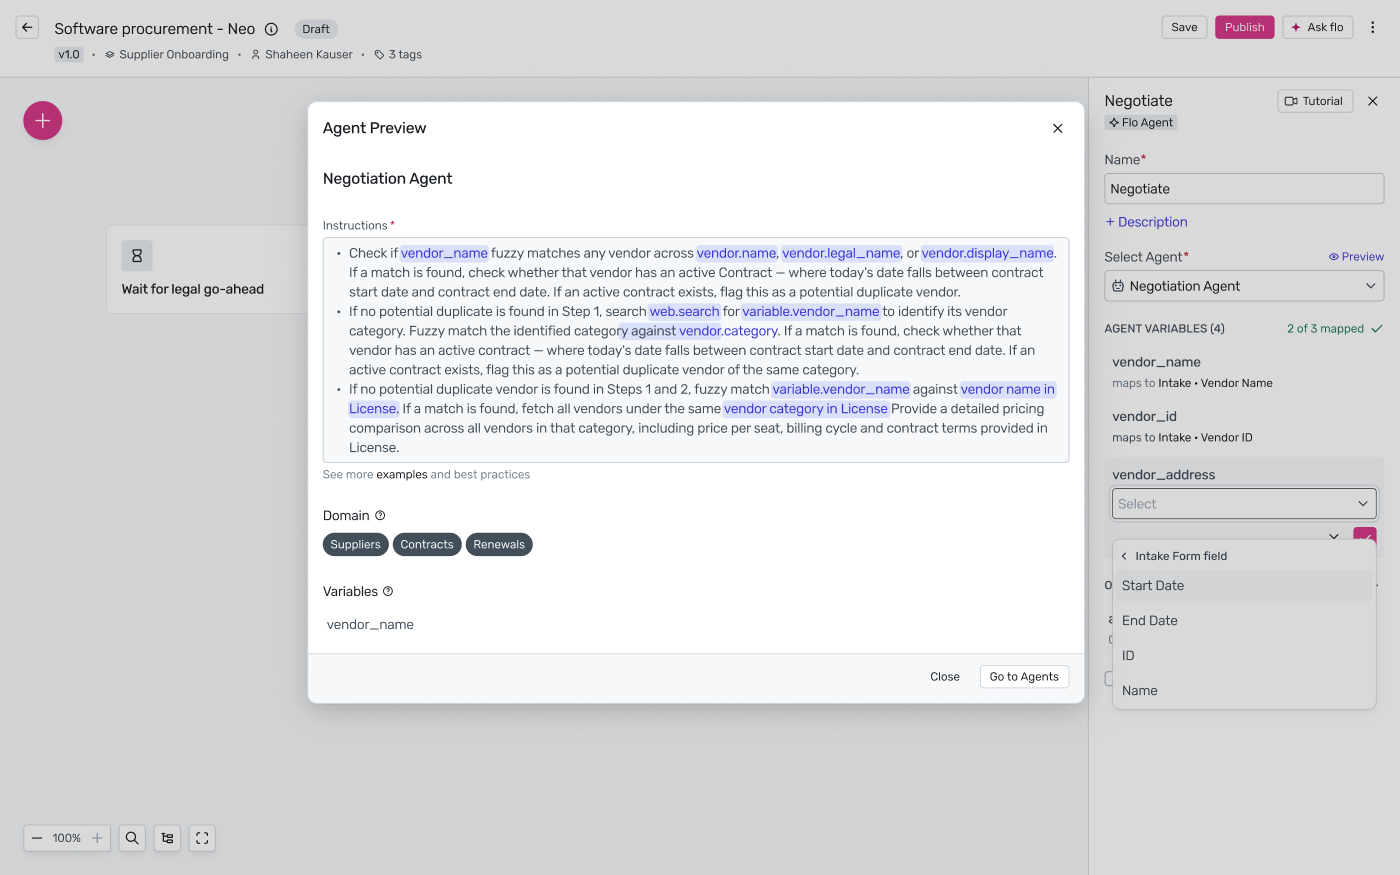
The step always runs that agent's latest published version — if you publish a new version of the agent later, the step picks it up automatically. The agent's Domain (which entities it can access) is fixed at the agent level and can't be changed from inside the workflow step.
Step 3. Map the agent's variables
Once an agent is selected, its variables appear under Agent Variables with a mapping progress indicator. For each one, click Click to map to open Select step, choose an earlier step in this workflow, then pick which field from that step to map in.


Step 4. Review outputs
The agent always returns a built-in agent_output variable (its full text response) — this can't be removed. Click + next to Output to add your own named output variable: give it a name and a description of what to extract, then write instructions telling the agent how to extract that specific value from its response.

Every output, including agent_output, is available to map into later steps the same way you mapped this step's inputs.
Step 5. Require confirmation (optional)
Turn on Require confirmation before moving to the next step (visible in the screenshot above) to pause the workflow here until someone approves the agent's result. Doing so reveals an Owner field — assign it to a specific role (e.g. Owner) so it's clear who's responsible for reviewing and confirming this step before the workflow advances.